Video: How to Set Levels on a StudioLive Mixer
Before you begin, here are a few general rules of thumb:
-
Always turn the Main fader and both the Monitor and Phones knobs
in the Monitor section down before making connections.
-
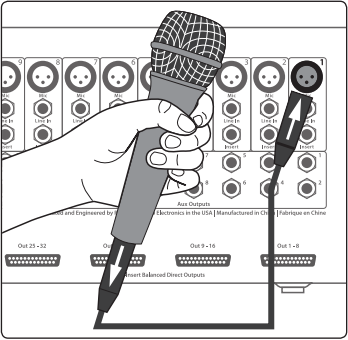
Before plugging or unplugging a microphone while other channels
are active, mute the channel to which you are connecting.
-
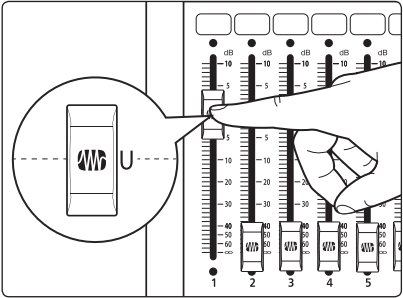
Your faders should be set on or near the “U” mark whenever possible. The “U”
indicates unity gain, meaning the signal is neither boosted nor attenuated. If the
main output of your StudioLive is too high or too low when your faders are at or
near unity, you can use the output-level knob on the rear panel of the StudioLive
to adjust the level up or down until you have achieved the optimal volume.
-
Do not allow your inputs to clip. Watch the level meters; when the LEDs near
the Clip mark, the top LED will illuminate, indicating that the analog-to-digital
converters are in danger of being overdriven. Overdriving the converters
will cause digital distortion, which sounds terrible. The XMAX™ preamps
in your StudioLive provide plenty of headroom; take advantage of it.
Your P.A. and studio equipment should be powered on in the following order:
-
Sound sources (keyboards, direct boxes, microphones,
etc.) connected to the StudioLive inputs
-
StudioLive mixer
-
Computer (if applicable)
-
Power amplifiers or powered monitors
NOTE: When it’s time to power down, your system should be turned off in the reverse
order. Now that you know what not to do, let’s get some audio going!
*******************************************************************
Level Setting Procedures
NOTE: These procedures help you get started getting audio through your mixer's
Main Output. These instructions are to be followed first for proper gain structure
before setting levels on other outputs for proper level setting.
1. Grab a microphone and a mic cable and plug them into the
StudioLive’s Channel 1 mic input.
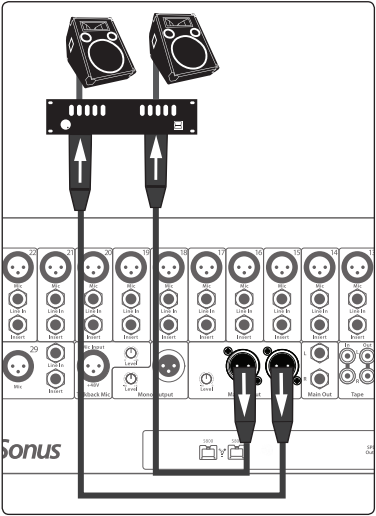
2. Connect the Main outs (TRS or XLR) of your StudioLive to
your power amplifier or powered monitors.

3. If you’re using passive speakers, connect them to your power
amplifier using speaker cable.
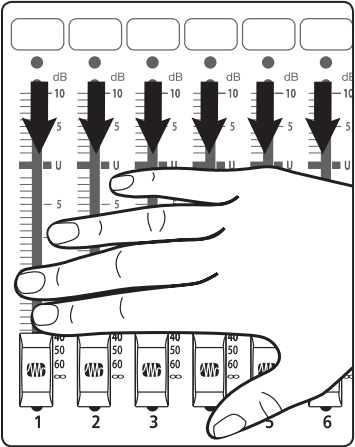
4. Bring down all the faders on your StudioLive to the ∞ setting.
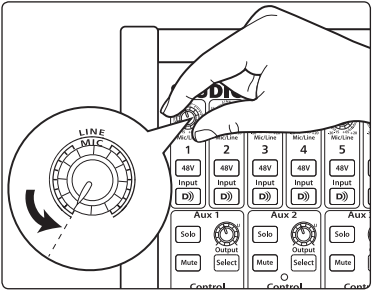
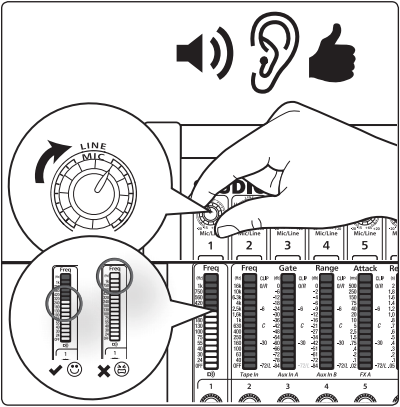
5. Make sure that the Mic/Line knob on Channel 1 is all the way
counter-clockwise.
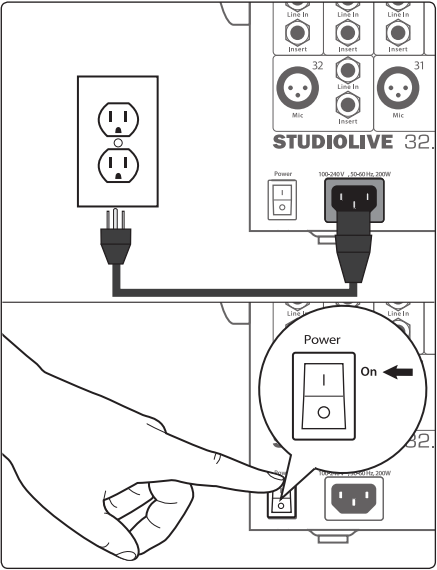
6. Plug your StudioLive into a power outlet and turn it on.
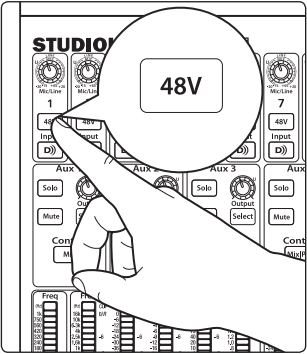
7. If your microphone requires phantom power, engage the 48V
button on Channel 1 of your StudioLive.
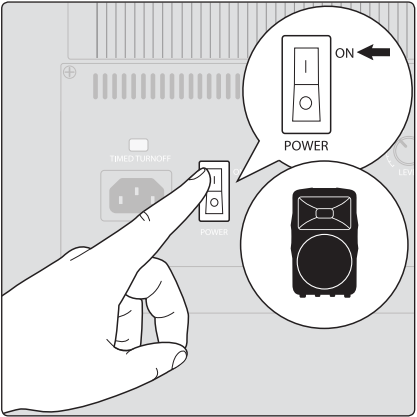
8. Turn on your amplifier or powered monitors.
9. Press the Input button in the Meter section.

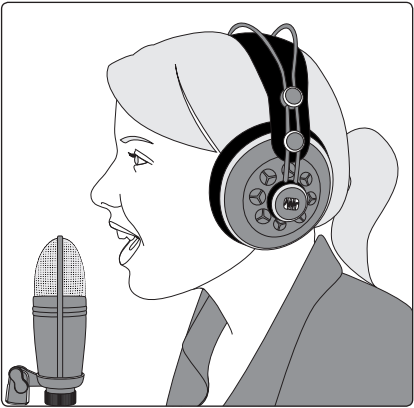
10. Speak or sing into your microphone at approximately the
same volume you expect during the performance.
11. Turn the trim knob on Channel 1 clockwise while watching
the first meter in the Fat Channel. Adjust the Channel 1 trim
knob until a little more than half of the green LEDs are lit. The
red LED at the top of the meter should never light up.
**************
The input meters (including the LVL meter) on your mixer
is shown as a digital scale called "dbFS" (Full Scale)
To learn how to read the meters you are seeing on your
mixer, please see this article on dbFS vs. dbu measurements
**************
12. Press the Select button on Channel 1.

13. Raise the Channel 1 fader until it reaches “U” (unity gain).
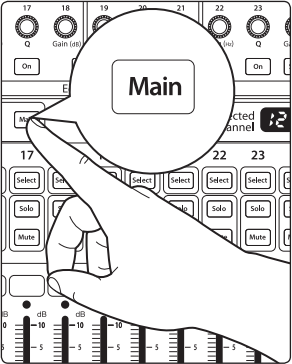
14. Press the Main button in the Assign section of the Fat
Channel so that it illuminates. This routes the channel to the
main output bus.
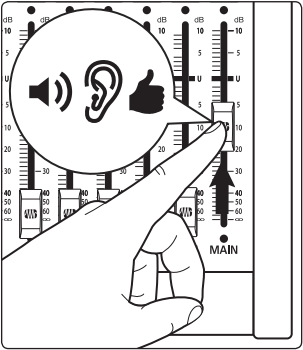
15. Bring up the Main fader until you can comfortably listen to
your microphone through your speakers.
16. With Channel 1 selected, you can use the Fat Channel to add
dynamics processing and EQ.
If you need further Assistance, contact Technical Support.