How to Create Cue Mix with AudioBox 1818 Headphones and Studio One on Mac OS X
This article is help Mac OS X 10.10 and 10.11 (existing or new) AudioBox 1818 Users who are running without AudioBox VSL Software and need to monitor their mix.
Here are 10 easy steps on how to create a Cue Mix in Studio One. How this is done with other DAW's is similar, just look for how to setup a Cue Mix with your preferred DAW.
If you've arrived at this article looking for simple instructions on how to route your headphones in Mac OS X to listen to iTunes or YouTube, see this article here.
If you already own an AudioBox 1818VSL and you are already working with Studio One, you can skip to Step 3 immediately.
All others continue reading.
Step 1: Select Audio Interface
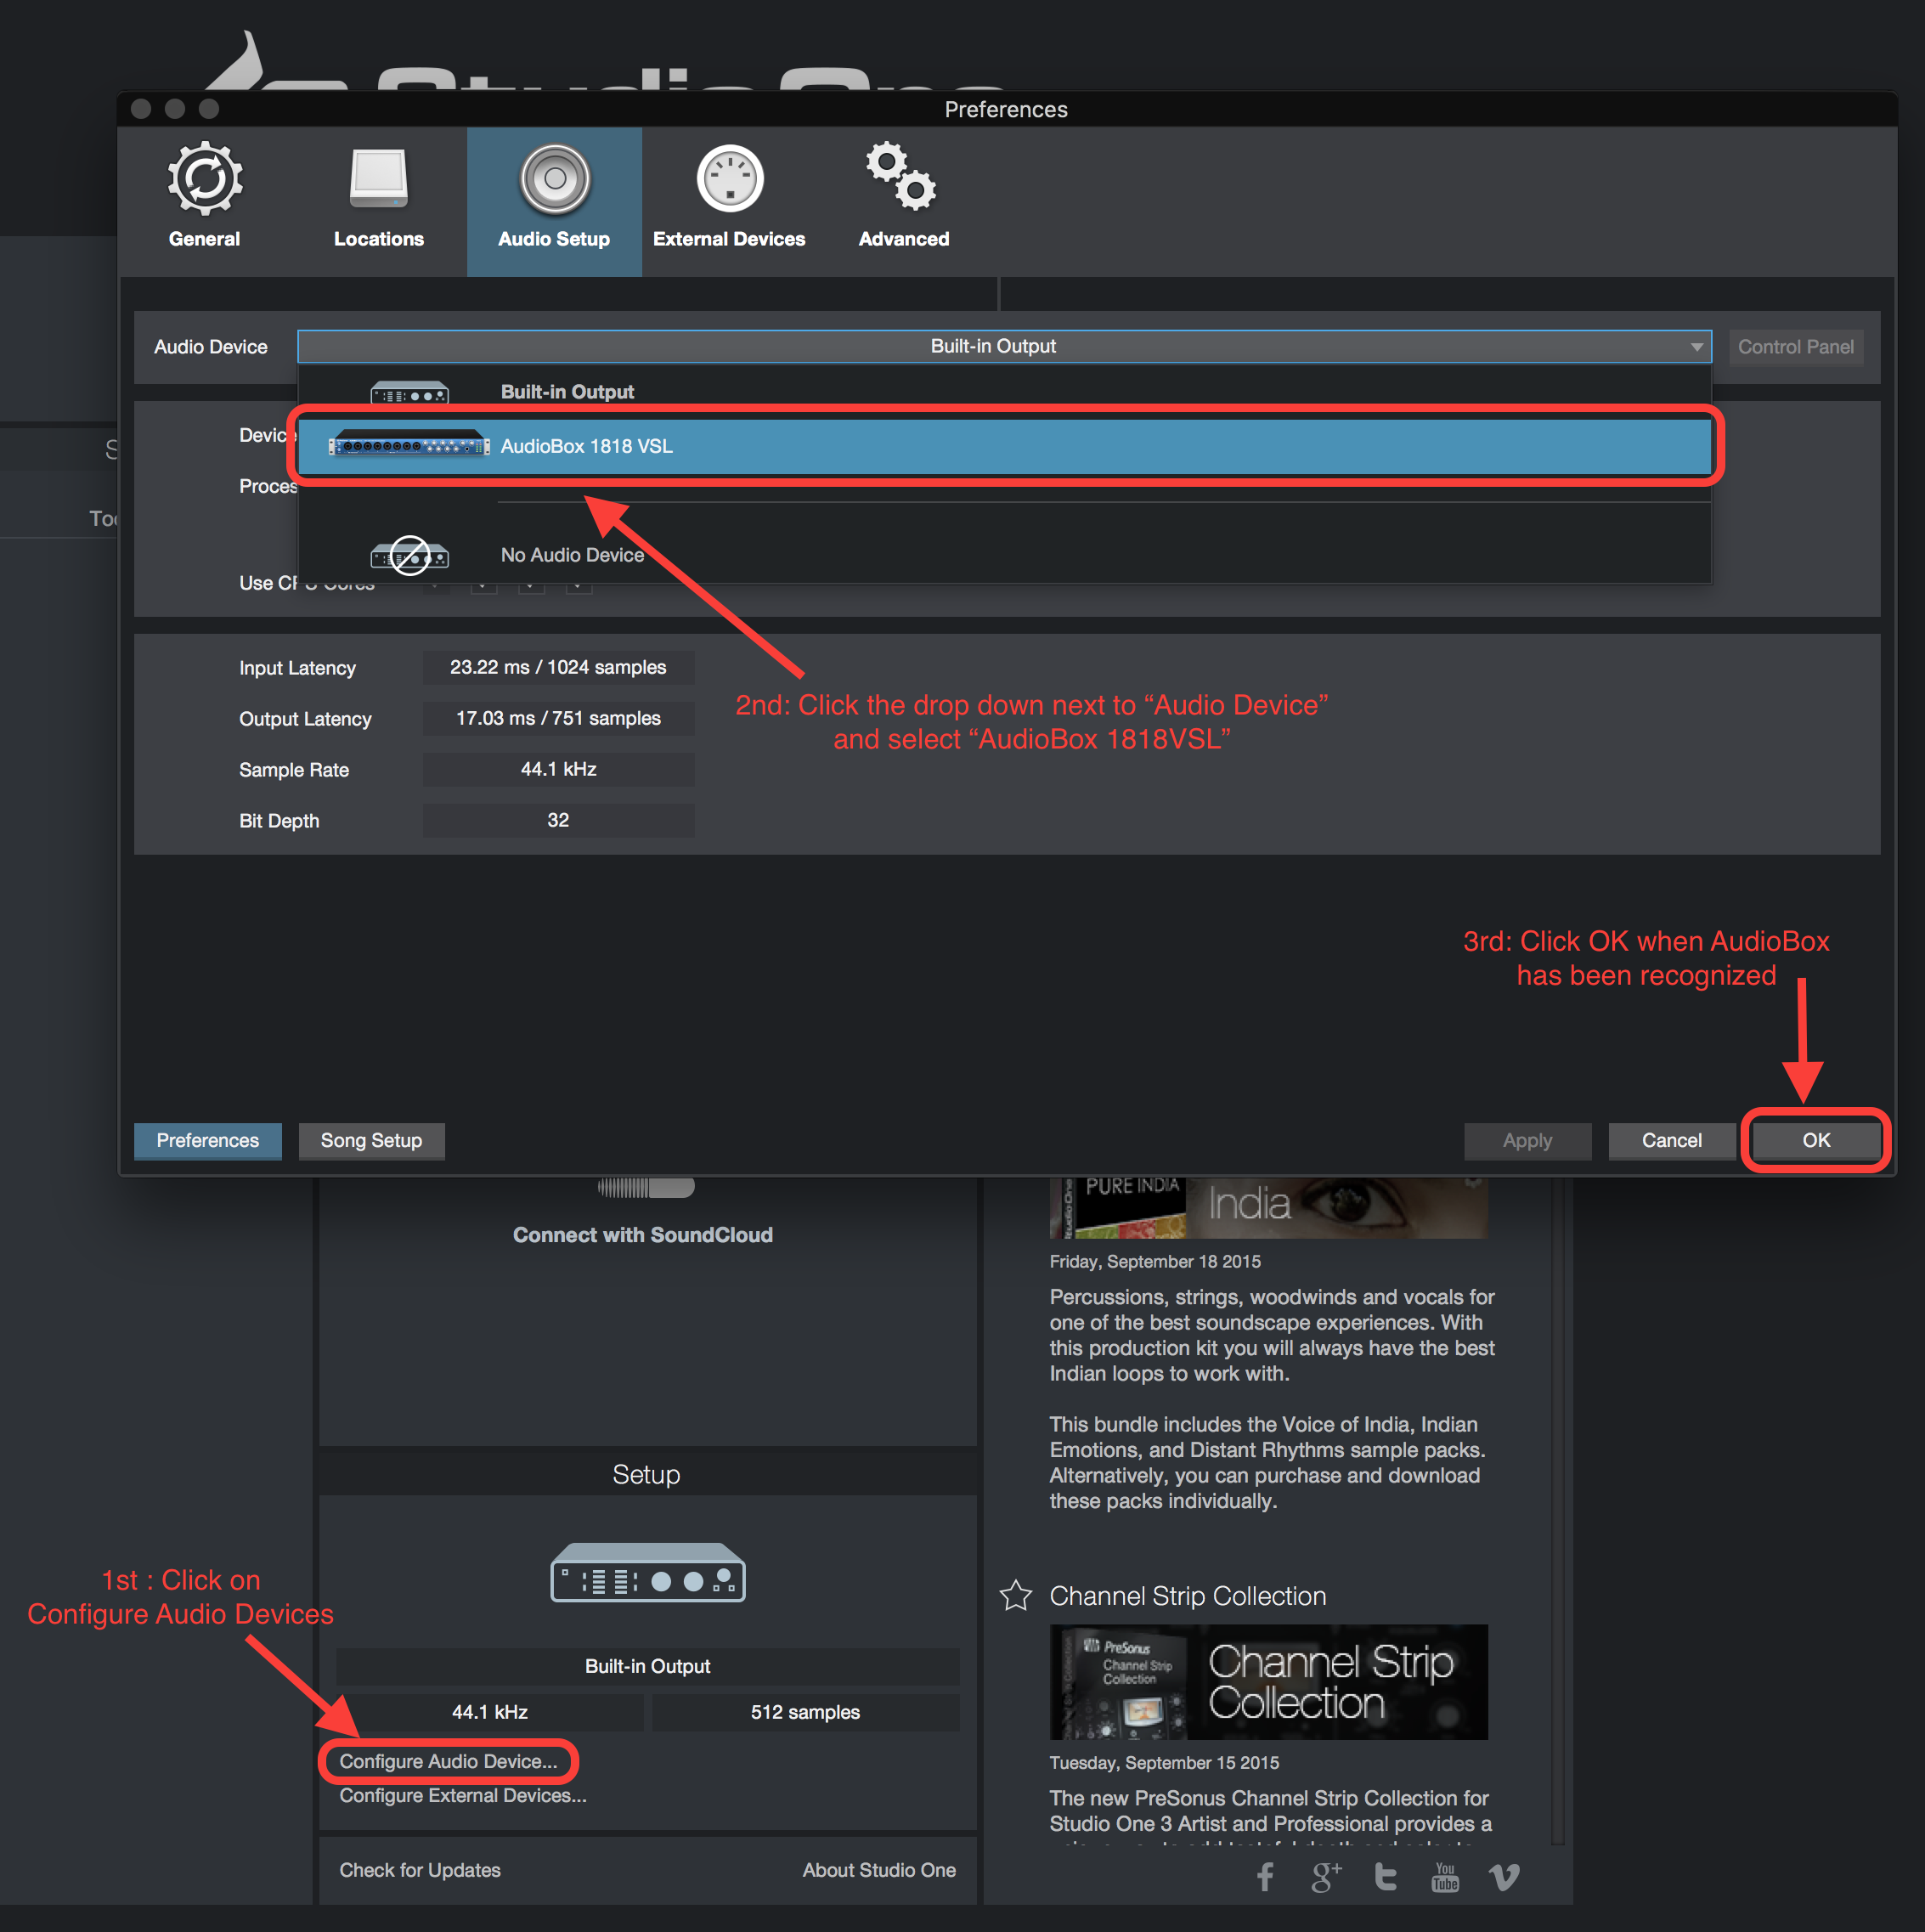
Launch Studio One and select you audio interface, if AudioBox 1818VSL is already selected, you can skip this step and go directly to Step 2.
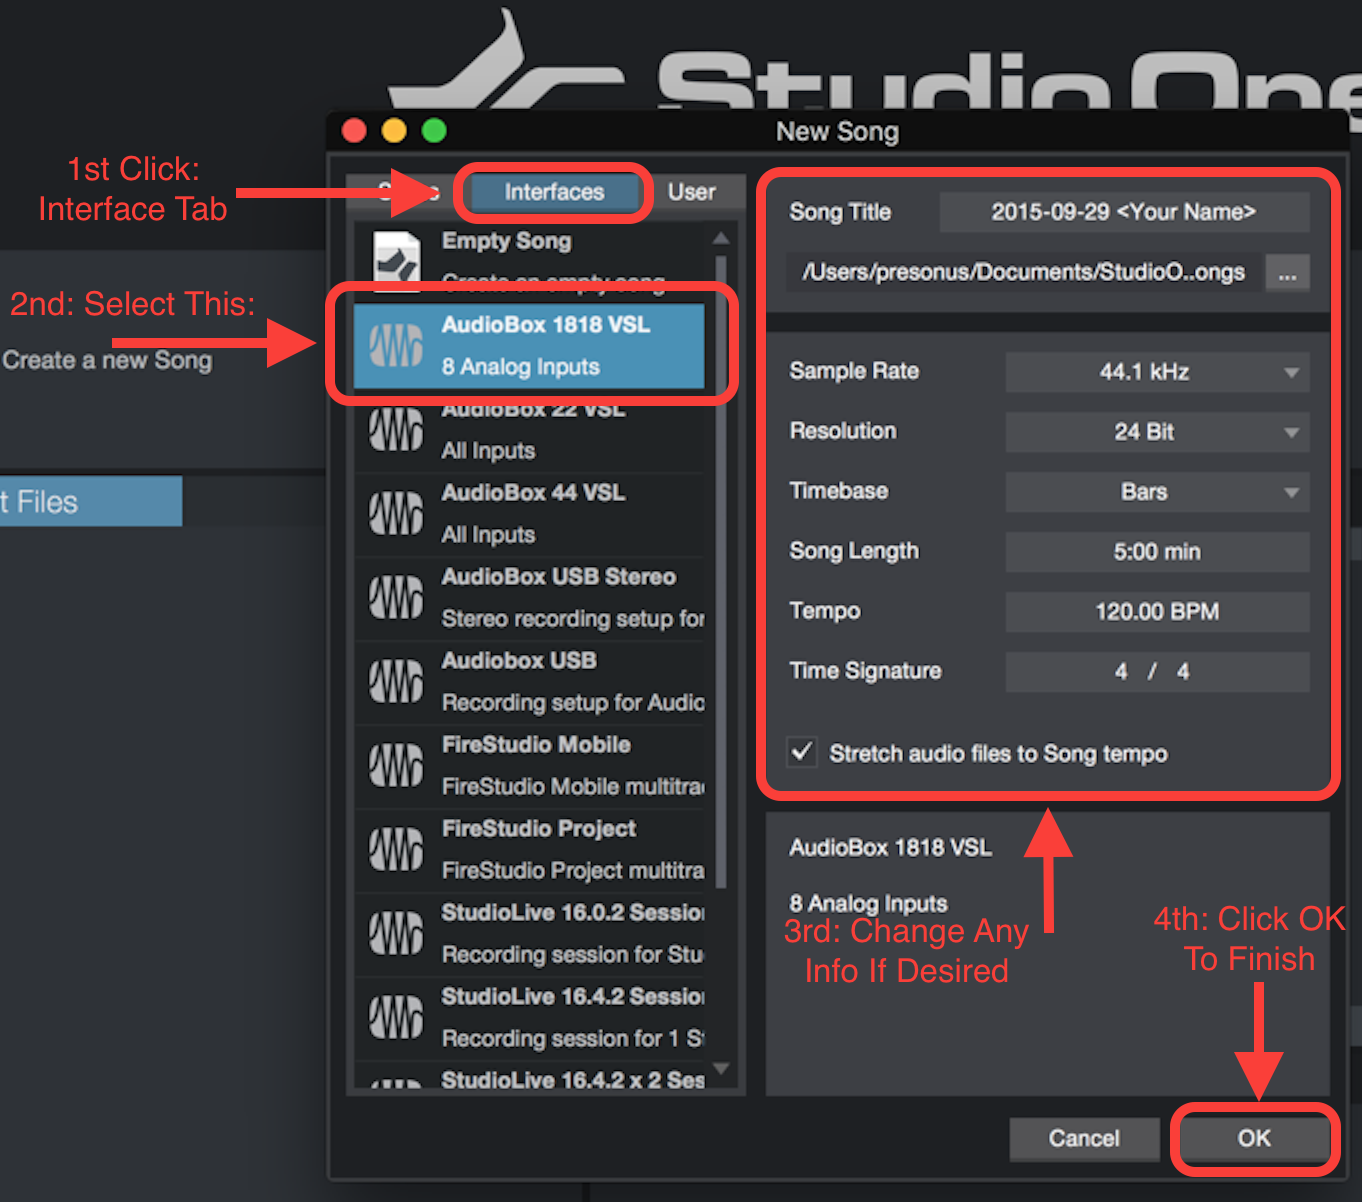
Step 2: Click "Create New Song"
First Click the Interfaces Tab and then select AudioBox 1818VSL in the first column,
Then change any of the relevant information such as Song Title, the sample rate, resolution, etc. Or if you're not sure, just leave the default settings.
Click OK to go to Step 3.
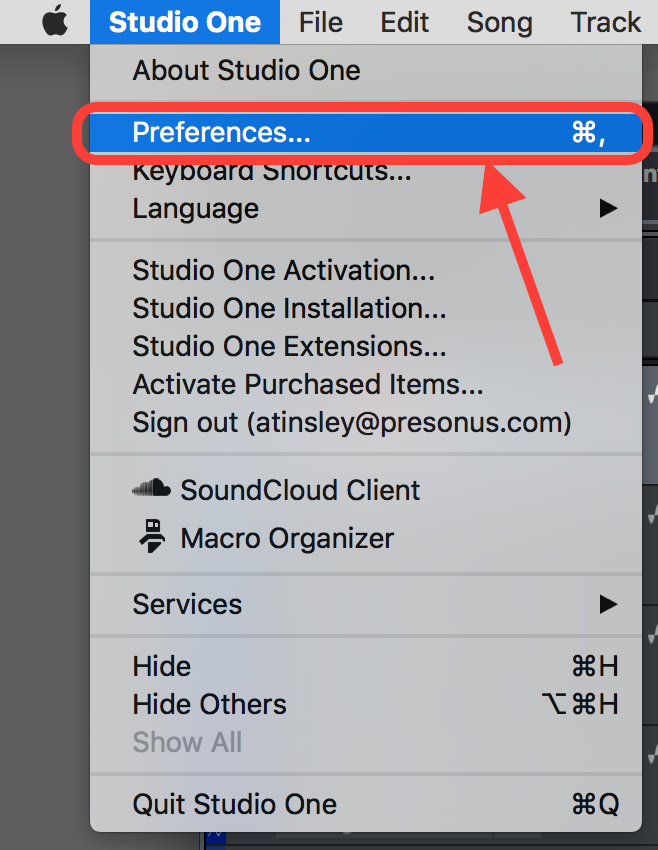
Step 3: Now we need to open up Studio One Preferences.
At this point you'll be placed in the main Arranger Song window in Studio One.
Under Studio One on the Top Menu click on Preferences.
(alternately, you can just hold the Apple Command Key and tap the Comma Key with your right and to bring up this menu.)
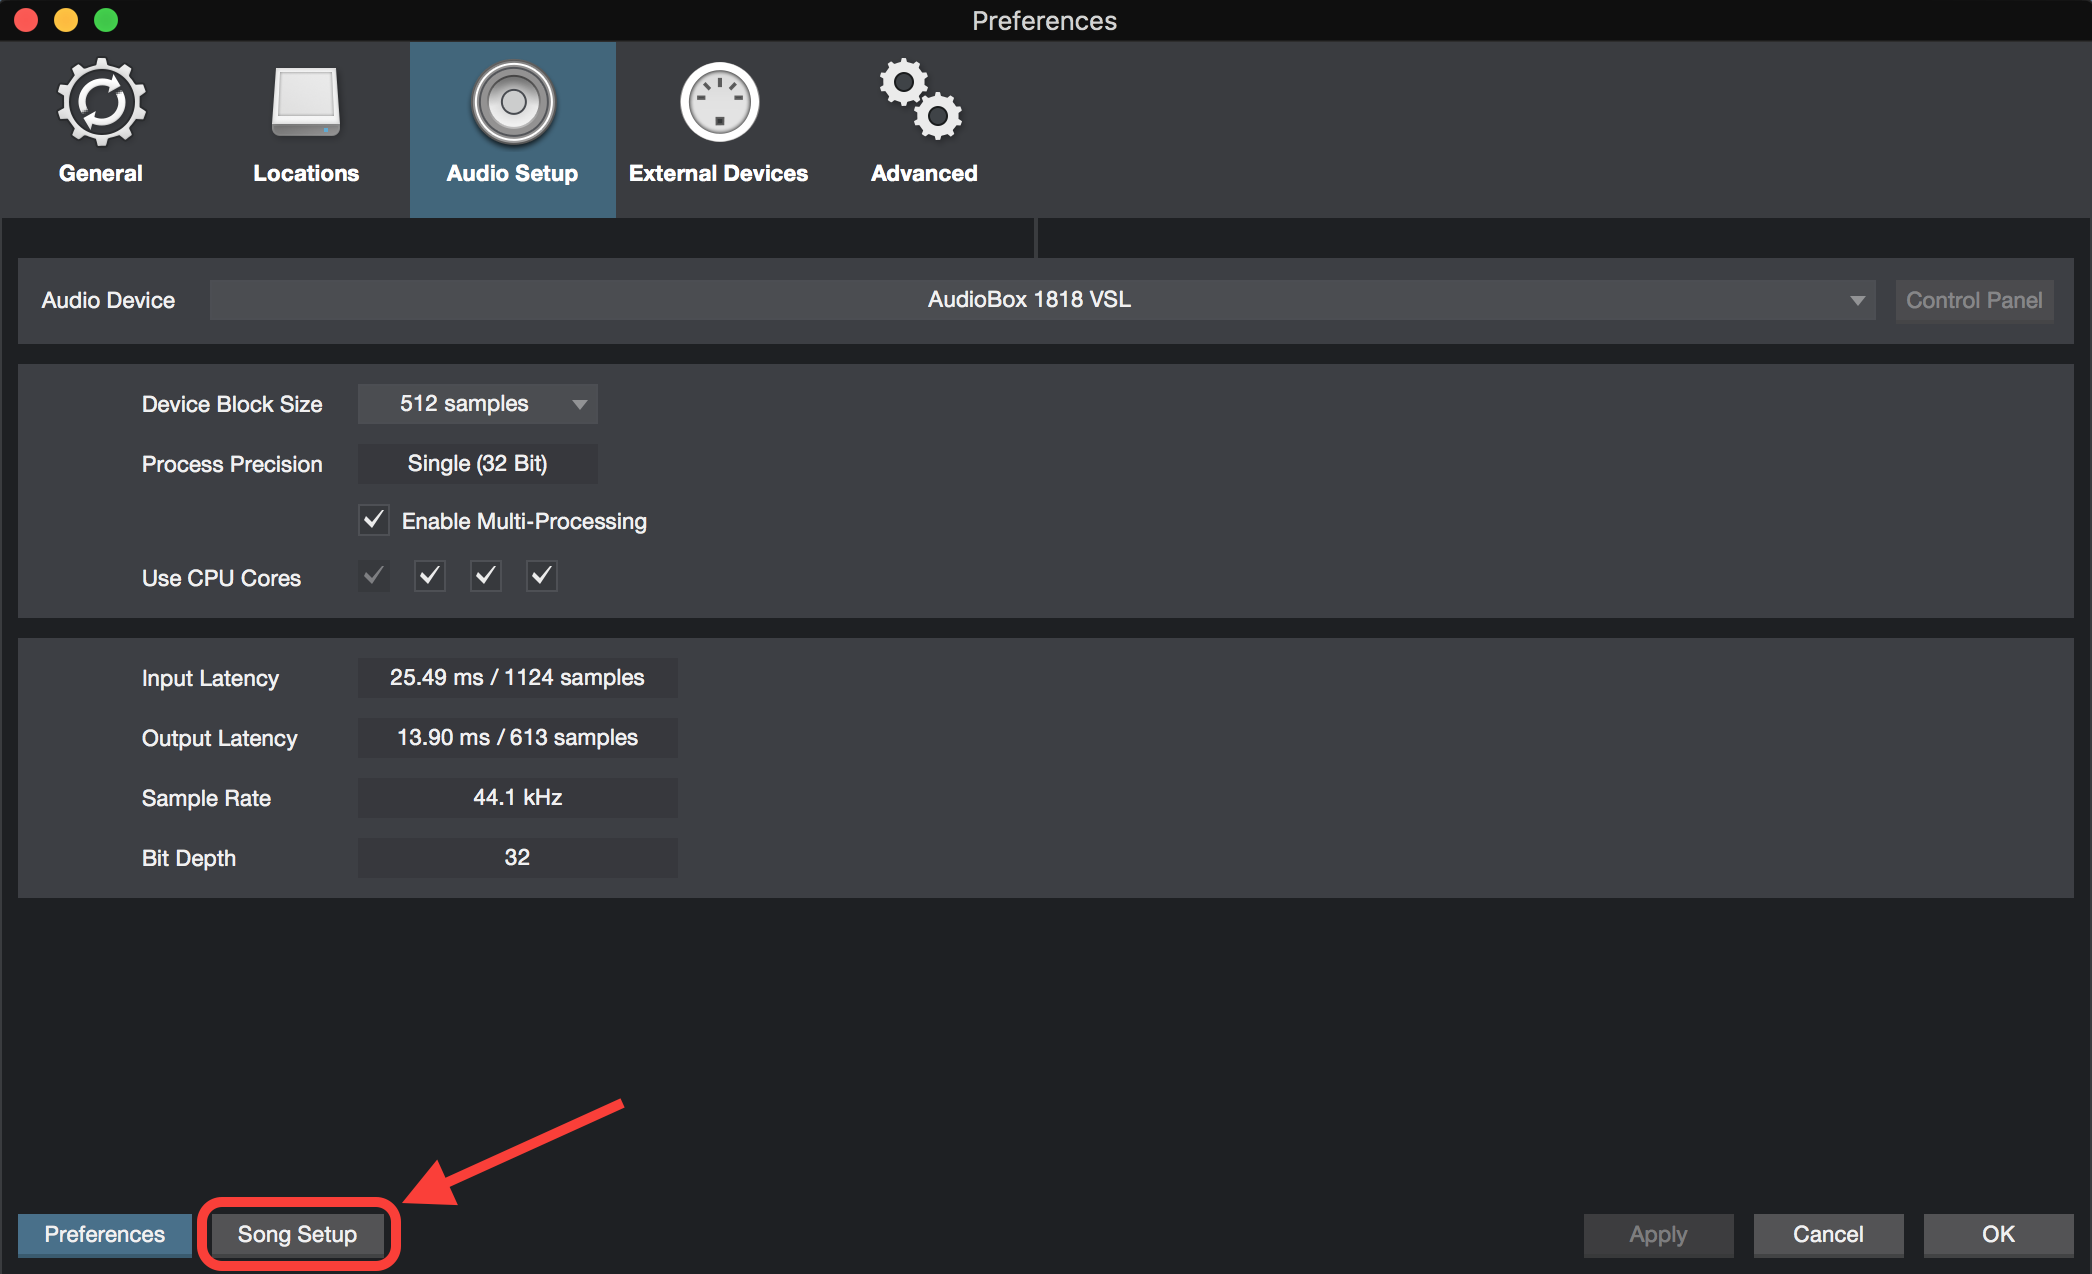
Step 4: Song Setup Access - Studio One Preference Menu
Click on Song Setup in the Studio One Preferences menu.
Step 5: Song Setup - Adding Output Channels to Studio One
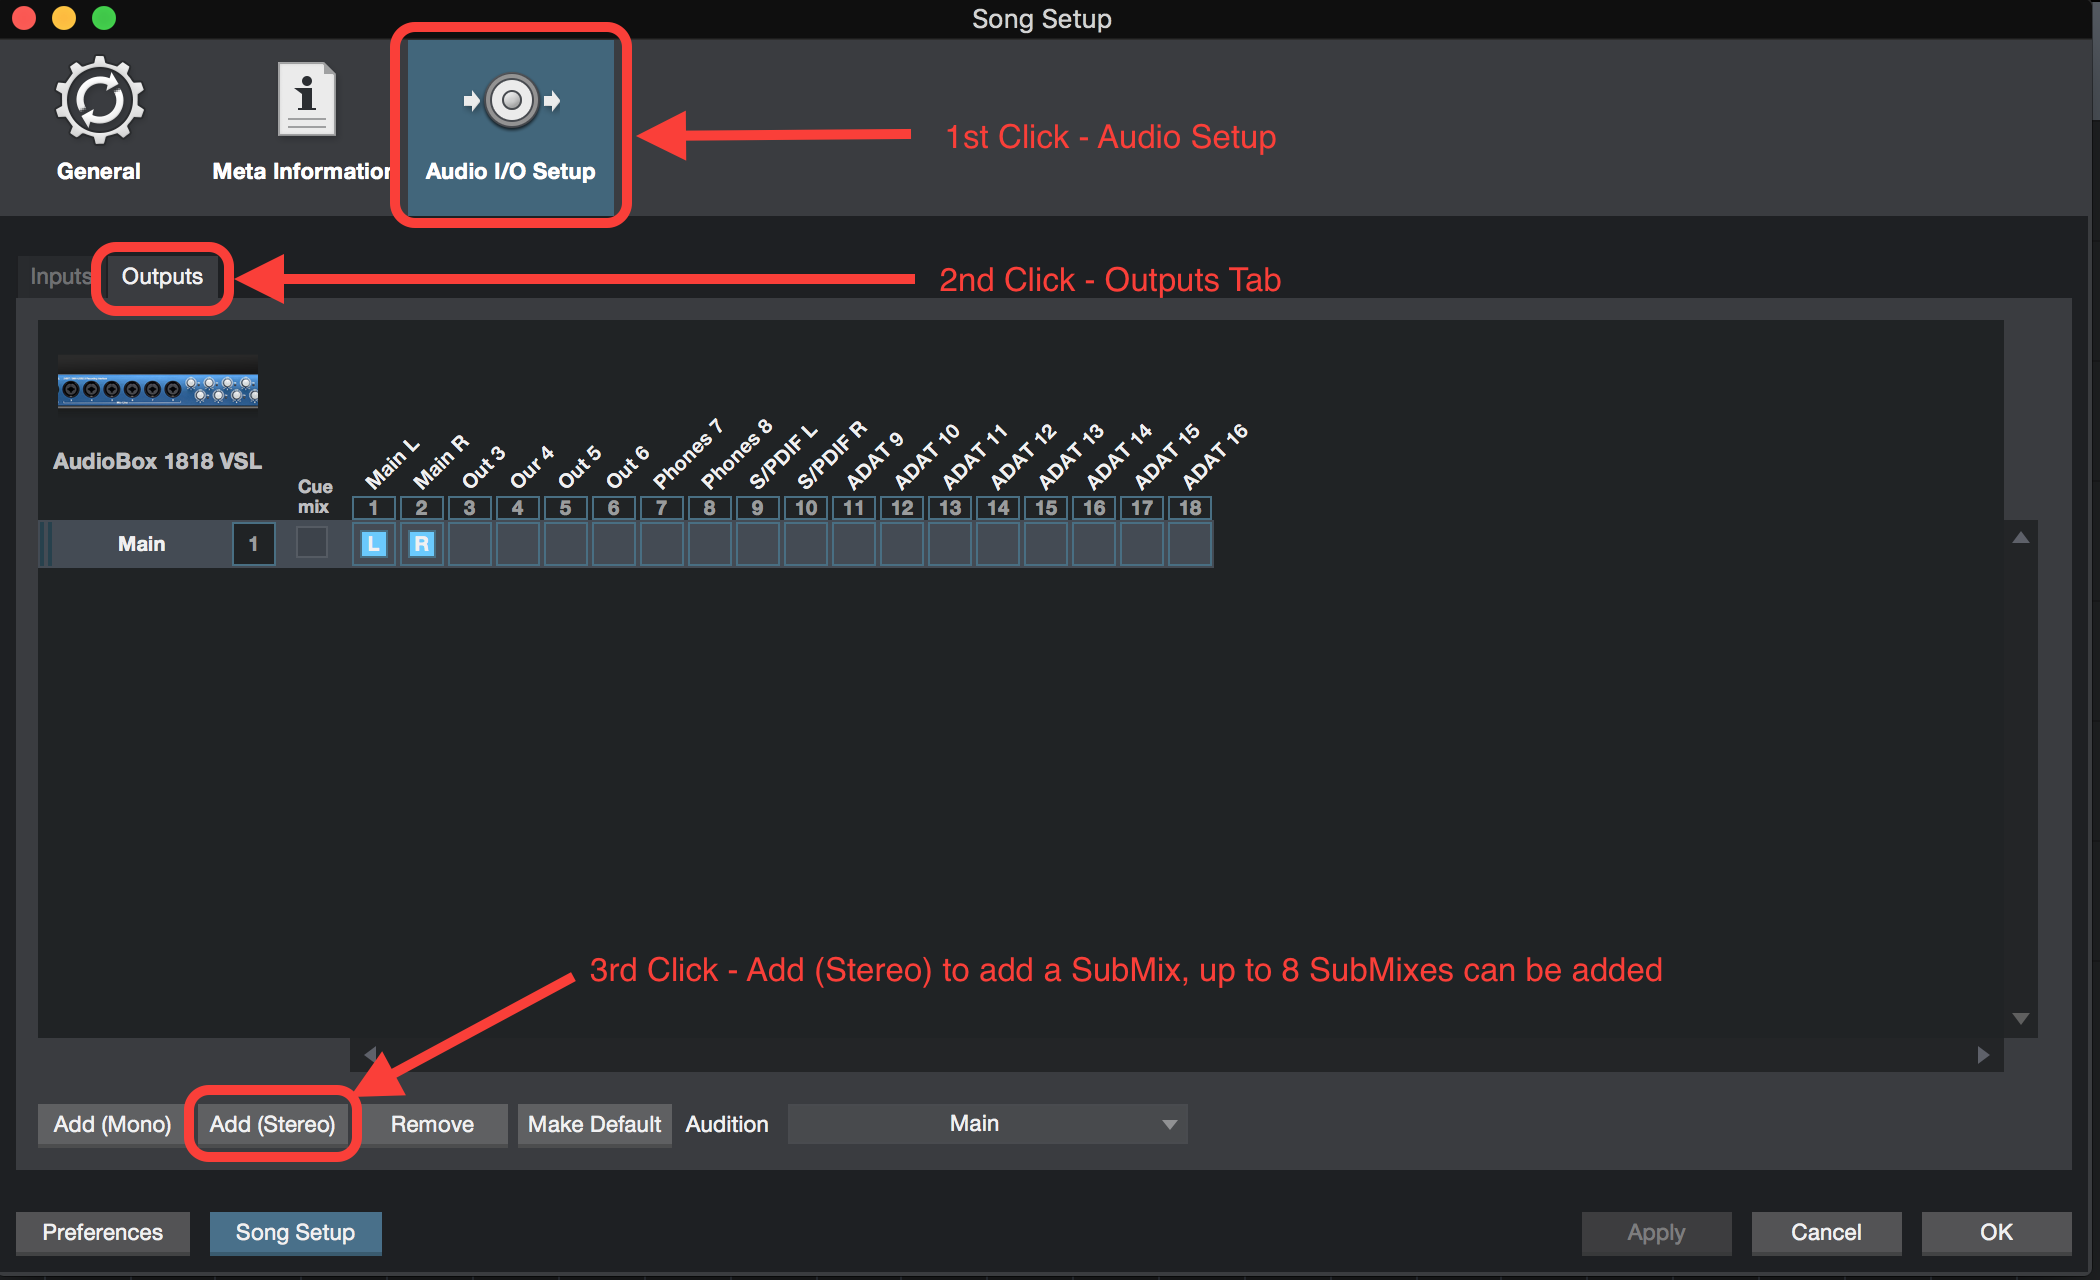
First, Click the Audio I/O Setup Menu Button
Second, Select 'Outputs' Tab
NOTE: You can now see the Output Channel Mapping of the AudioBox 1818VSL. Notice how Headphone L is on Output 7 and Headphone R is on Output 8, we will want to add that as a Stereo Bus.
You may choose to alter what we show you here and only add one buss, we think once you learn how to do this you may find new uses for this in your setup for more than just headphone mix.
Third: Click "Add Stereo" at least 3 times until you see 'Sub 3' appear below where it says "Main".
Then Click "Apply" but don't hit OK yet because we have more to do.
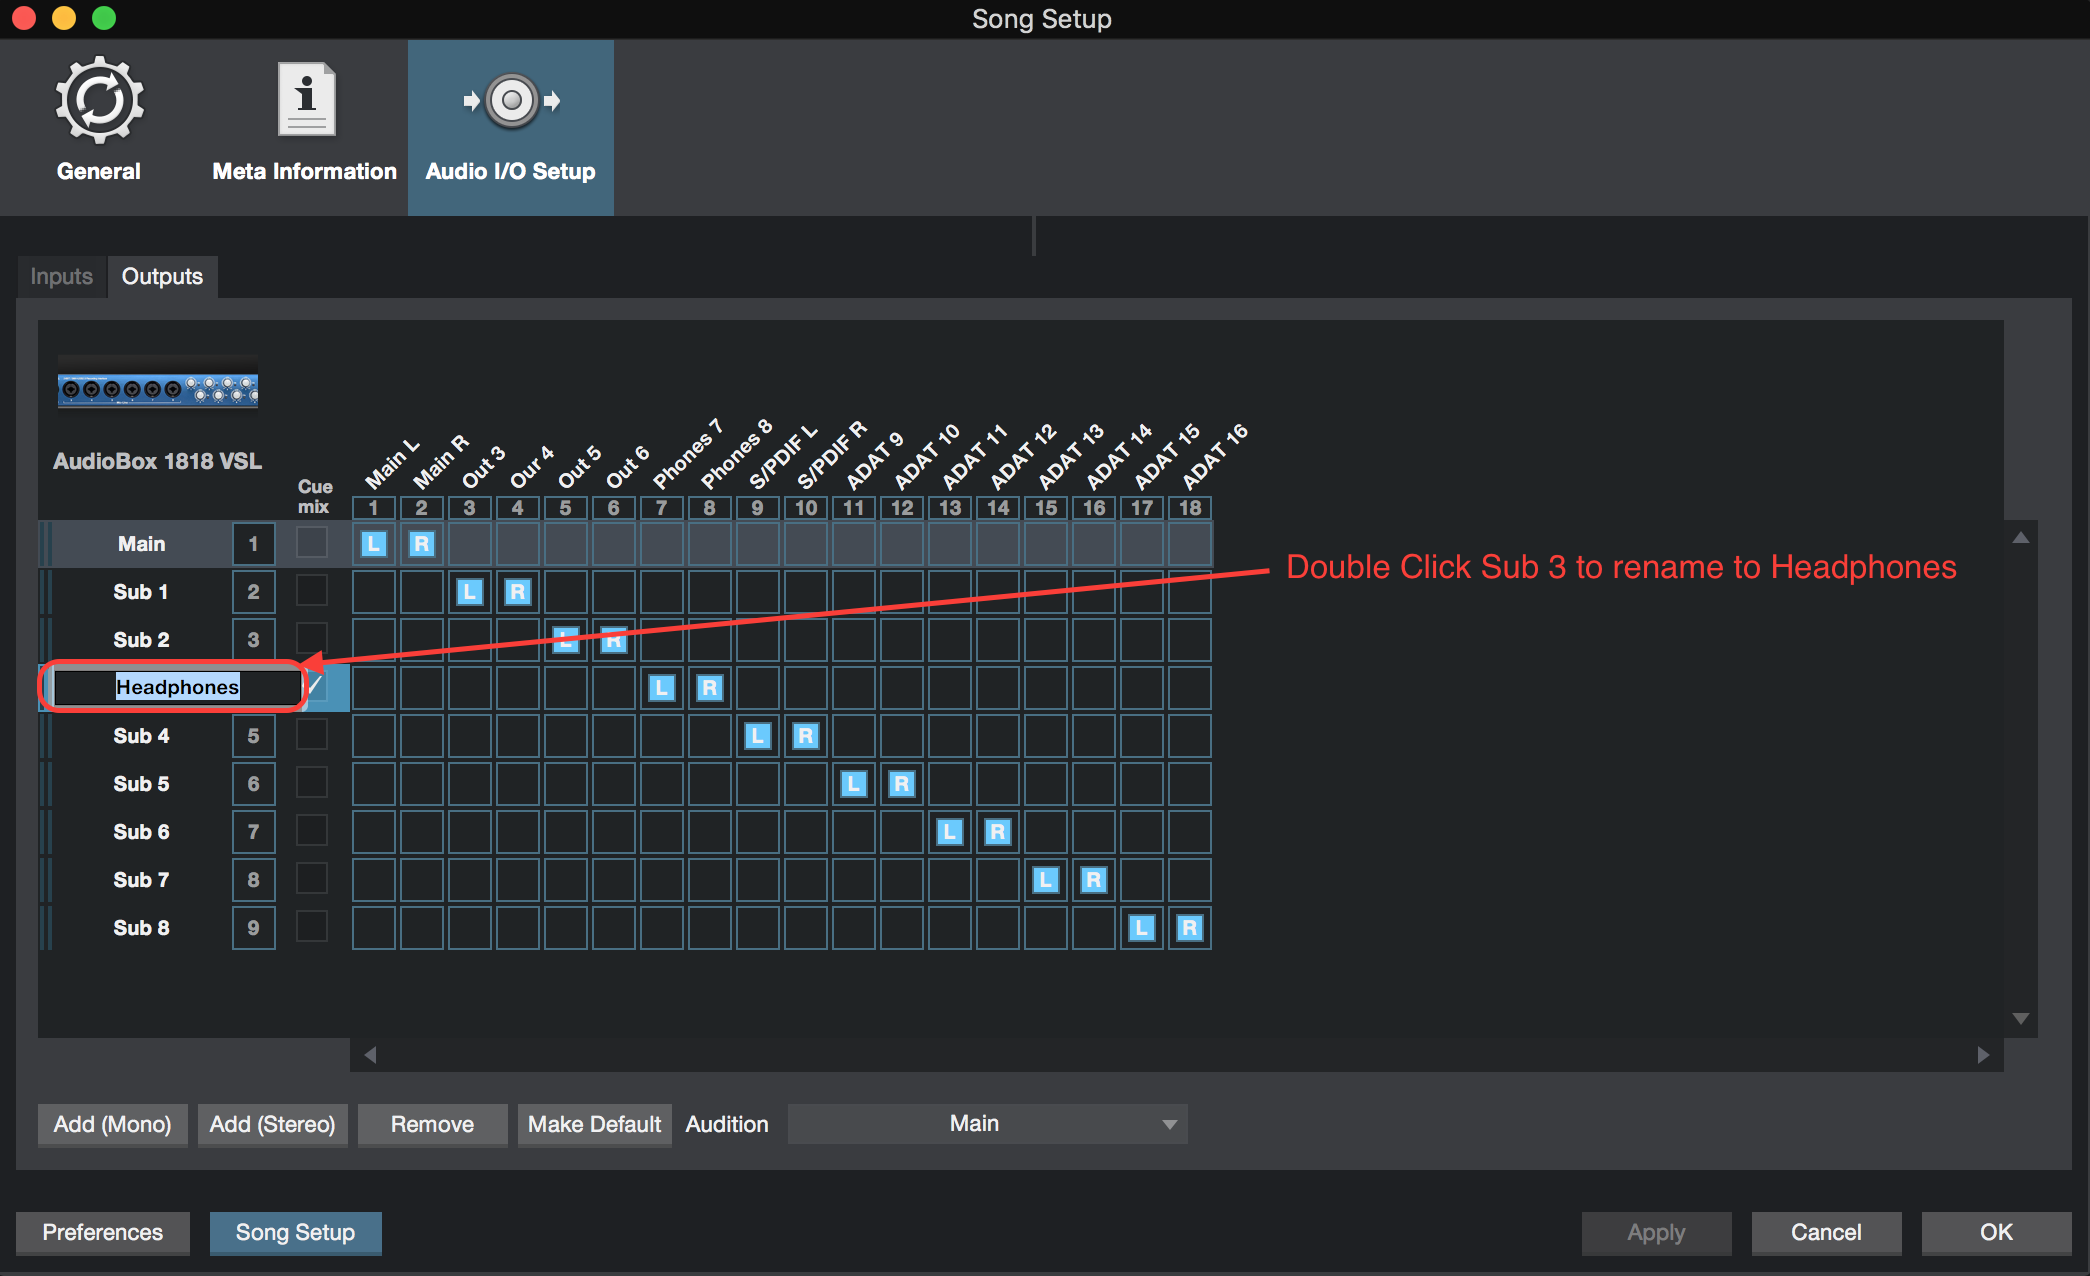
Step 6: Renaming Sub 3 for Headphone Mix
Double-Click 'Sub 3' to rename to 'Headphones' (or whatever you want that you'll know this is your headphone mix)
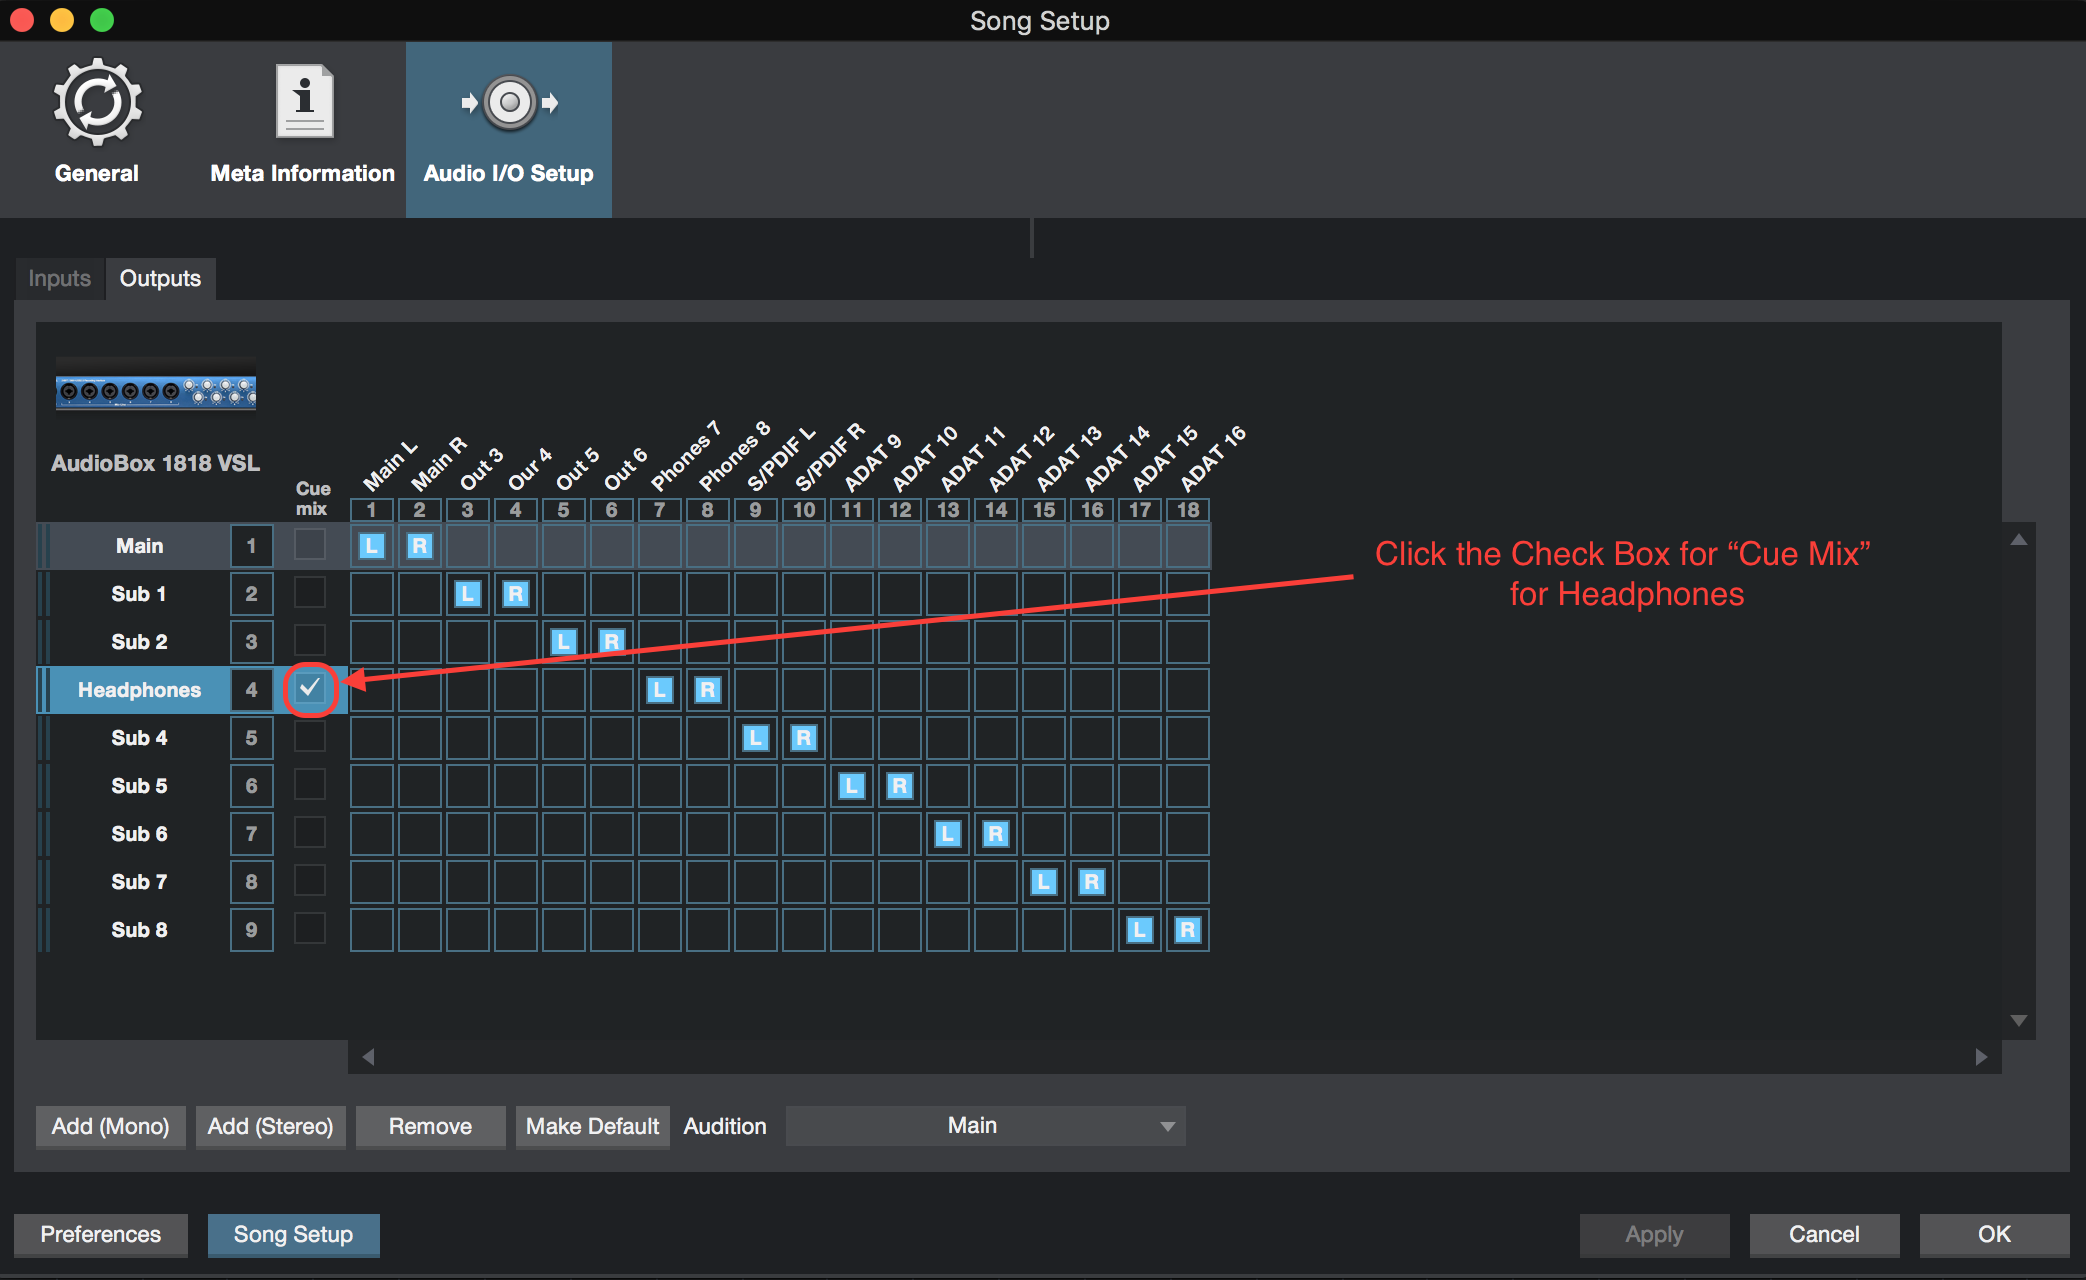
Step 7: Adding Headphone (aka Sub 3) to a Cue Mix.
Now check the little box next to where you setup Headphones in the column that says "Cue Mix"
What is a "Cue Mix"?
Cue Mix sends all outputs to the Output that it is assigned to. In this case we are assigning the headphone outputs (7 and 8) to listen to all channels independent of the Main Output.
You can read more about Cue Mix in the Studio One manual. To reach the manual, click on Help in Studio One and select "Studio One User Guide". Then search for Cue Mix.
Click "OK" when done to be taken back to the Arrange Window in Studio One.
At this point you are technically done, you can now hear your playback of all your channels, however we want you to see where the "Cue Mix" appears and how you can adjust it should you feel the need.
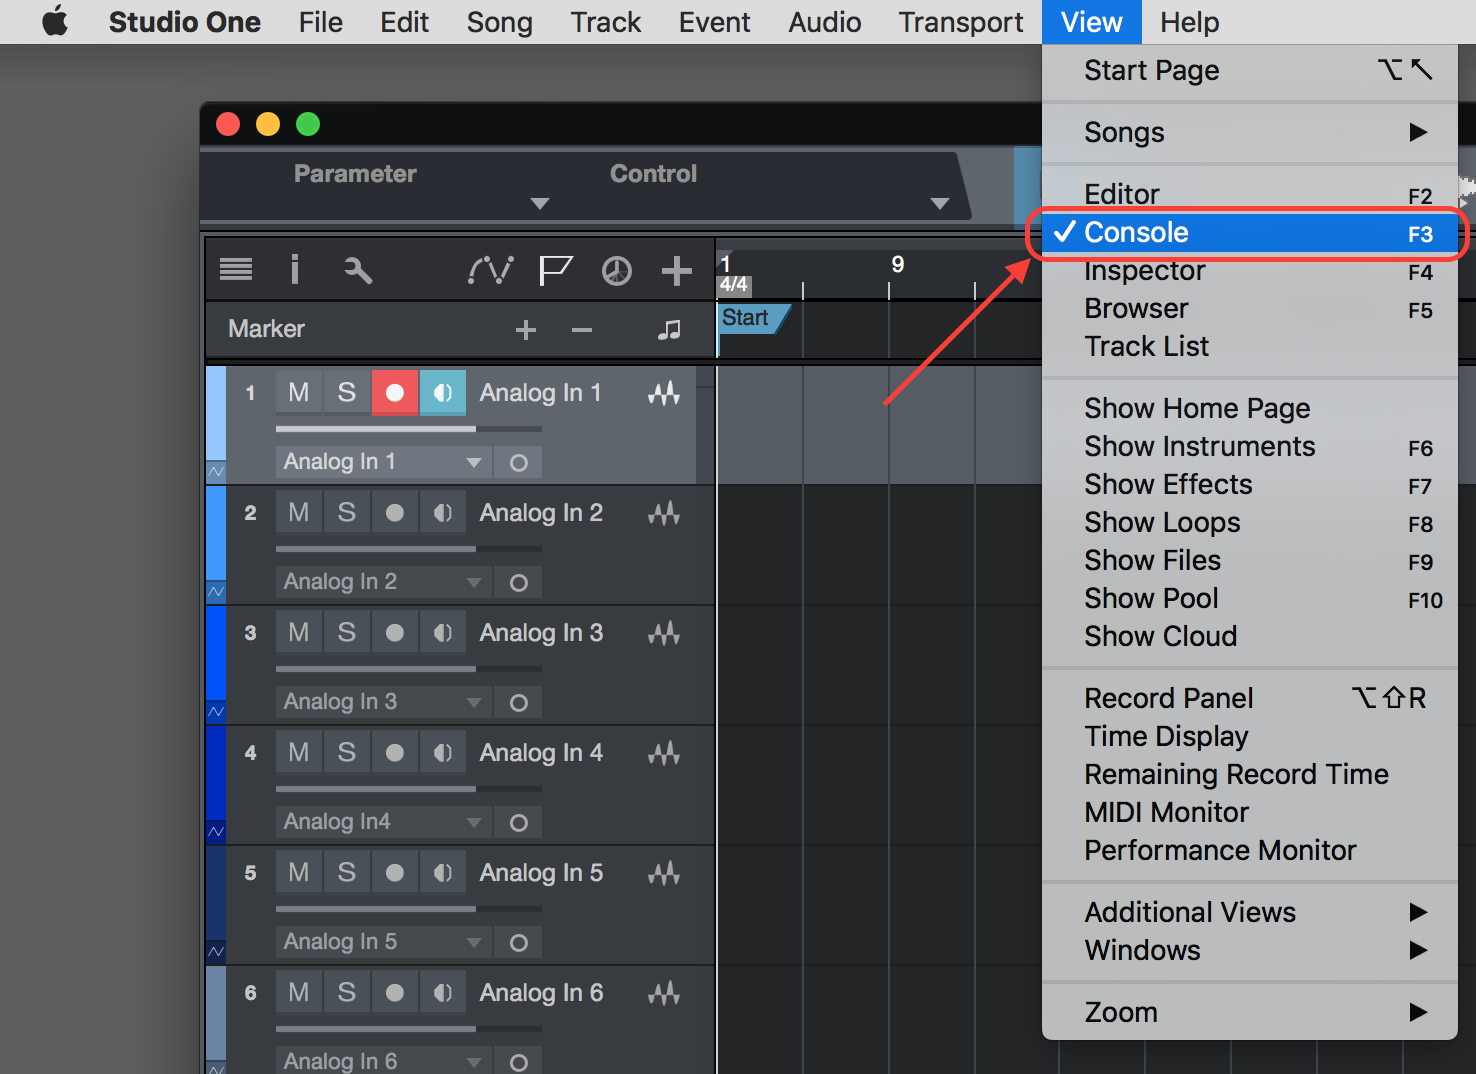
Step 8: Opening Console on Arranger Window
NOTE: If your Mixer is already on your Arranger Window, Skip to Step 9.
If your Mixer is not already On Screen, click fn+F3 (on a Mac) or for PC (just hit F3, for some gaming or laptop keyboards, you must also hit fn+F3)
On a Mac Keyboard the fn key is above your "Delete" Key, on a Mac / PC Laptop Keyboard fn Key is in the lower left corner (most often).
Alternately you can click on "View" on the Studio One Menu and select "Console".
Step 9: Getting to see Cue Mix.
Once you select Console on the View menu, should see something that resembles this at the bottom of your Arranger window.
Once there click on the Up Arrow over the Down Arrow and a new level of information will appear over your channels.

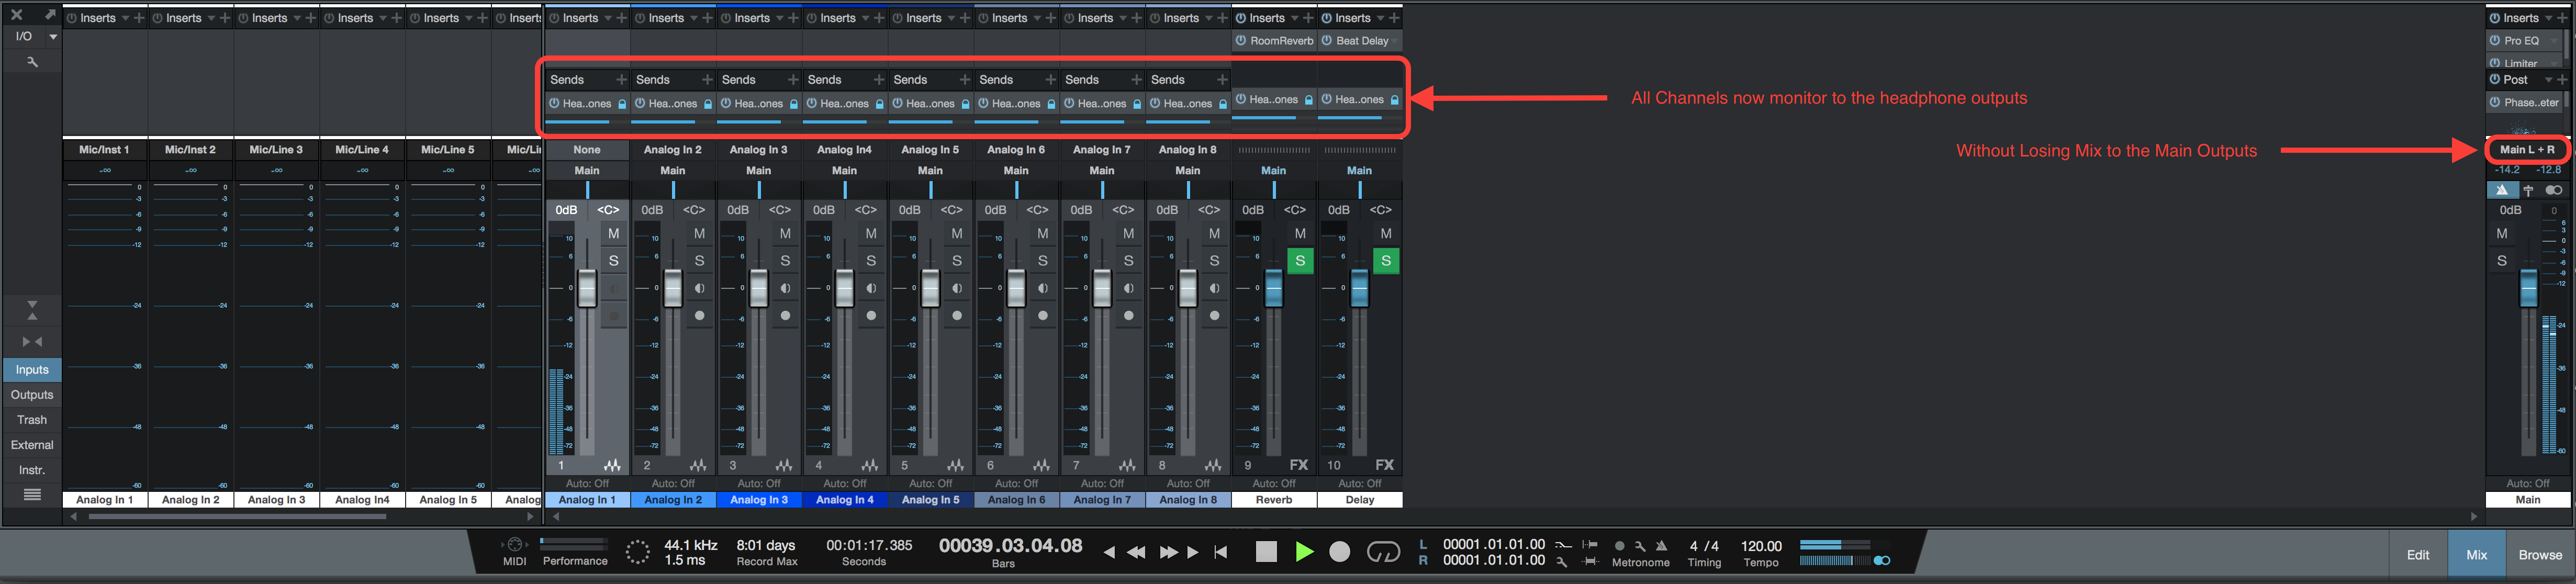
Step 10: Cue Mix Uncovered
All Channels now monitor to the "Headphone Outputs" that were assigned in Audio Output in Song Setup menu.
Fortunately you now have Headphone Outs without losing your Main Mix to the Main Outputs.
You'll see above each channel in there is an independent level adjustment for each Cue Mix. So you can tailor your mix to your needs.
Keep in mind that any changes to the Main Output are not reflected in the Cue Mix.
For this you'll want to monitor to your main speakers, use the Main Volume Knob on your AudioBox to control the level going to your speakers.
That's it, you're done.
Now this is unique to each song that you create, you'll need to set this up for each song you create. There is no Universal Setting that holds true across all new songs you create.
You can however create a Song Template that opens every time, we suggest creating a blank Song Template, and using that to load from each time you start a new Song. This ultimate is the best solution.
There are of course other ways to do this in Studio One, this is the fastest and easiest method, you can share your tips and tricks with other Studio One users in the Community Forum where you may find more information about this.