Why would I need to Uninstall & Reinstall my FireStudio drivers?
- My Universal Control crashes when I launch it
- My device Device window is not opening properly or not opening at all
- My Universal Control launch window displays driver version "0.0.0"
Answer:
Sometimes drivers do not install properly and can cause numerous issues with the functionality of your device. This is usually caused by certain files not being overwritten properly, or older files from previous installs causing conflicts. These issues can normally be resolved by simply manually uninstalling the driver and software before installing the new version.
*******************************************************************
Uninstalling Universal Control AI using the Uninstaller application
NOTE: Since the release of Universal Control 1.7, we now have an uninstaller for OSX (10.6.8 and later ONLY) which will remove all Universal Control and Firestudio related files (just as a manual uninstall would). Download Universal Control 1.7 or above for Mac, double click on the Presonus_Universal_Control_17.dmg that you downloaded, and run the Un-installer first., then continue with the uninstall and re-install process starting with the section Removing .bom and .plist files below, and making sure to do the Disk Permissions Repair and PRAM reset steps.
NOTE: On OSX 10.8 and later, you may need to temporarily disable Gatekeeper to allow the uninstaller to open and run. See here for info: http://support.apple.com/en-us/HT5290
*******************************************************************
If you do need to do the manual uninstall by hand, the instructions are as follows:
Manually Removing FireStudio family Drivers and Software
1. Disconnect your FireStudio Family interface
2. Double click on MacHD to launch a new finder window. The following list includes every possible file that may have been installed on your Mac, depending on which driver versions you have installed. If you do not see one of these files, do not be alarmed. The files are listed by location tree. For example, to locate the MacHD/Library/Preferences/PaeFireStudio.startup file, you will double click on MacHD and Open the Library folder. In the Library folder, you will open the Preferences folder where you will find the PaeFireStudio.startup file. This is the file you will move to the Trash.
3. Delete the following from your computer (note some files will require that you type in your administrative password):
- MacHD/Applications/Universal Control
- MacHD/Applications/FireStudio Control Console
- MacHD/Applications/FireControl
- MacHD/Applications/FireStudio Lightpipe Mixer
- MacHD/Applications/StudioLive
- MacHD/Library/Application Support/PaeFireStudio
- MacHD/Library/Application Support/PreSonus
- MacHD/Library/Audio/MIDIDrivers/PAEFireStudioMIDIdriver.plugin
- MacHD/Library/Preferences/PaeFireStudio.startup
- MacHD/Library/Receipts/PreSonusUniversalControl.pkg
- MacHD/Library/Startup Items/PaeFireStudio
- MacHD/System/Library/Extensions/PaeFireStudio.kext
(If you are using OSX 10.7 Lion or 10.8 Mountain Lion, the User Library folder is hidden. To get to it, with Finder open click the GO menu at the top, or control-click on Finder in the Dock, then select "Go To Folder" and enter: ~/Library. This is necessary for deleting the next 4 files)
- MacHD/Users/YOUR USERNAME /Library/Caches/Juce/jucAppLock_Universal Control
- MacHD/Users/YOUR USERNAME/Library/Caches/Juce/Universal Control
- MacHD/Users/YOUR USERNAME /Library/Preferences/FireControlSettings.settings
- MacHD/Users/YOUR USERNAME/Library/PreSonus
*******************************************************************
Removing .bom and .plist files
*If you've done the UC 1.7 uninstall script method above, and these files are not there, you can proceed with the next section.
Note: if you use Snow Leopard, Lion or Mountain Lion, you also need to do the following:
- Right Click the Finder
- From the pop-up window select Go To Folder
- Paste or type in this string: /private/var/db/receipts
- In the folder that opens, find the files that have Universal Control in the label and move them to the Trash.
For example, you are looking for:
- com.PreSonus.pkg.Universal Control.bom
- com.PreSonus.pkg.Universal Control.plist
Repairing Disk Permissions
- Go to MacHD/Applications/Utilities/ and open “Disk Utility”
- Select your System drive (Mac HD) from list on the left
- Click “Repair Disk Permissions”
- Once your Disk Permissions have been repaired, Shut down (not restart) your Mac
Resetting your PRAM
- Locate the following keys on the keyboard: Command, Option, P, and R. You will need to hold these keys down simultaneously
- Turn on the computer
- Press and hold the Command-Option-P-R keys. You must press this key combination before the gray screen appears.
- Hold the keys down until the computer restarts and you hear the startup sound for the second time.
- Release the keys. At this point, your computer should be completely zeroed out and you can reinstall.
Downloading and Installing the latest driver
- Go to http://www.presonus.com/support/downloads
- Download the driver for you FireStudio family product from the PreSonus website. The zipped file will be automatically extracted and stored in the Downloads folder on your computer unless you have manually changed this preference in Safari.
- Quit your web browser and any other application you have running
- Go to MacHD/Users/YOUR USERNAME/Downloads and locate the “PreSonus_Universal_Control_XX.dmg file.
- The .dmg file is a disk image. Double click it to open the disk image on your desktop
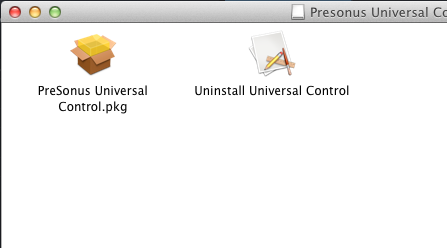
- In the window that comes up there will be an Uninstaller script, and a .pkg installer package.
- Double click on PreSonus Universal Control.pkg to launch the installer
- When the installer launches, click “Continue”
- Click on the icon of your Internal hard drive and click “Continue”
- Click “Install”
- When the installation has finished, click “Finish”
- Reboot your computer
- Once your computer has rebooted, connect your StudioLive mixer interface. When your interface has synced with your computer, it is ready for use.