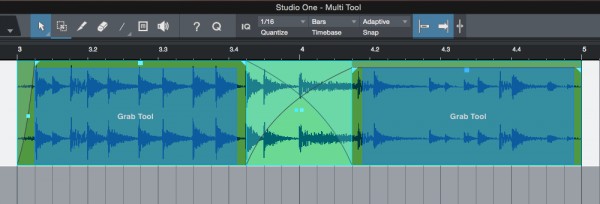
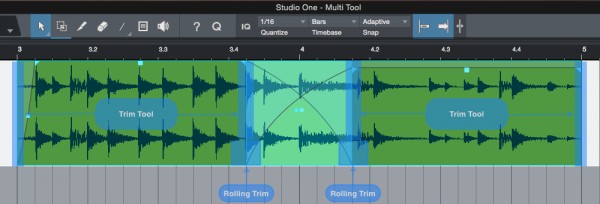
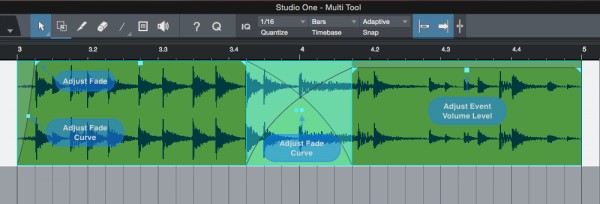
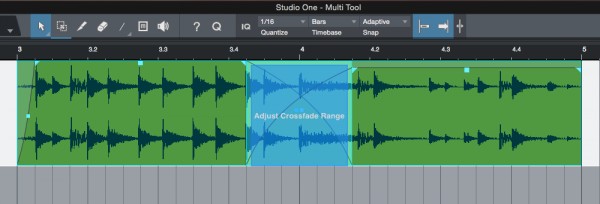
The multi tool in Studio One is actually quite capable of performing many editing functions with just the selection of the "Arrow Tool" in the toolbar. The tool's function will change depending on it's relation and context within an "Event." Take a look at the images below. The blue highlighted area tells you the placement of the "Arrow Tool" and describes what editing function you can perform there. The tool will also change it's tool shape and orientation according to where it is placed.
You can grab and move events by clicking and dragging within the "Grab Tool" highlighted area.

You can perform various types of event trimming by placing your "Arrow Tool" within the highlighted areas here. Trimming In or Out requires placing the "Arrow Tool" at the edge of an "Event." Also, placing your "Arrow Tool" between two events that could overlap, will give you the ability to perform a "rolling trim edit".

It is easy to create "Fade Ins" and "Fade Outs" simply by clicking and dragging the handles in the top corners of an audio event. A secondary handle appears on the fade which will allow you to adjust the fade's curve. (Logarithmic or Exponential).
The handle at the top of an audio event will allow you to adjust the event volume level.

After creating a crossfade between to audio events, you can adjust the range at which the crossfade occurs by clicking and dragging within the highlighted area pictured below.

There are other options available for editing using keyboard modifiers. Please refer to the Studio One reference manual for more information.