StudioLive - Using Plugins with Studio One 2 Live
Video describing the process of plugins in software on the StudioLive mixer:
Using Plugins Live with Studio One 2
***First notes about Firewire Inputs and returns:
Firewire Input:
Each StudioLive input is hard-coded to receive its respective FireWire return. Outputs
1 through 24/16 in your recording application route these playback streams to their
respective channels on the StudioLive (that is, the software’s Output 1 always goes to
StudioLive Channel 1 FireWire Return and so on). Once you route a track in your
recording application to play through one of these outputs, it will always be
accessible on its channel by simply pressing the FireWire return button.

Power User Tip: It is important to think of your FireWire returns and your analog inputs
in the same way. When a FireWire return is engaged, it replaces the analog input in the
mix. You can process it in the Fat Channel, include in it Aux mixes, and send it to an FX mix.
StudioLive 16.0.2 Owners: As discussed in Section 4.5 of the StudioLive
16.0.2 Owner’s Manual, you must first engage FireWire Return mode before
you are able to use the MultiMode buttons to engage/disengage a FireWire
return on a channel. The FireWire returns to the stereo channels behave
just as the analog inputs do. So if you have Channel 11/12 unlinked, only
FireWire Return 11 will be heard on that channel. Once you engage Stereo
Link for Channel 11/12, FireWire Returns 11 and 12 will both be heard.
*****************************************
Main FireWire Return:

To provide the most flexible mixing environment, the main mix output for any
application should be assigned to the Main FireWire Return. These FireWire returns
are hard-coded to the FireWire Return buttons in the 2 Track In (StudioLive 16.4.2 and
24.4.2 only) and Monitor sections of the StudioLive. In this way, you can monitor the
main output from your recording application without using two channels on your
StudioLive, leaving the other channels available to be routed to the Fat Channel or
for inserting a plug-in on a live instrument (see the next section for more details).
The Main FireWire Return button is routed as follows:
• StudioLive 24.4.2: FireWire Returns 25-26
• StudioLive 16.4.2: FireWire Returns 17-18
• StudioLive 16.0.2: FireWire Returns 1-2
*****************************************
The instructions below are followed after reading Section 7.3.2
of this StudioLive Software Reference Manual first to setup
your Inputs and Outputs up correctly.
*****************************************
Using Plug-In Effects as Inserts
FireWire streaming on your StudioLive is continuously bidirectional. This
means that the StudioLive is always sending signals from the direct FireWire
sends on all input channels, as well as from the auxiliary inputs and buses
assigned to the second bank of FireWire sends (StudioLive 16.4.2 and 24.4.2
only). At the same time, the StudioLive is receiving signals back from the
FireWire returns. Because the FireWire returns always come back to their
respective StudioLive channels, you can quickly insert a plug-in from your
recording application into any channel strip and monitor it in real time.
In this example, we will insert the Beat Delay plug-in from
PreSonus Studio One onto Channel 4 of the StudioLive.
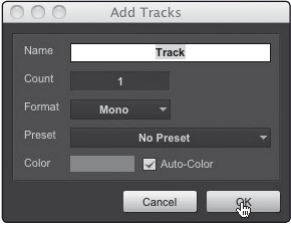
1. To begin, create a mono audio track in Studio One.

2. Assign its input to Channel 4 and its output to Output 4.
NOTE: (Several DAW applications, including Apple Logic, do not offer mono output
buses. If this is the case, you must route the output stream to, for example,
Channels 3-4 and pan the channel all the way to the right so that it will only
be sent to Output 4. Please consult your software’s user manual for specific
instructions.)

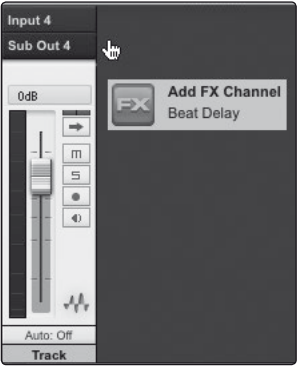
3. Once you have the routing set up in Studio One, drag-and-drop the Beat Delay
plug-in onto your track and record-enable it. Software monitoring will be enabled
automatically.

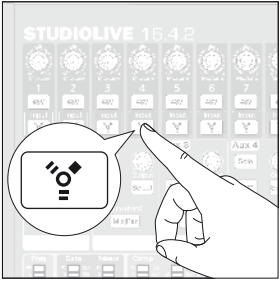
4. Press the FireWire Return button on Channel 4 of your StudioLive. You can now
monitor the analog signal from Channel 4 on your StudioLive with your inserted
effect (in this case, Beat Delay).

Power User Tip: When using plug-ins as inserts, it is very important that you set
as low a buffer size on your computer as possible without creating performance
issues. For most new computers, this won’t be an issue. A buffer size of 128 or less
will provide low enough latency for most plug-in types; however, dynamics and
EQ plug-ins and performance plug-ins such as amp-modelers may require lower
latency settings. See Section 3.1 for more information on buffer size settings.
***Please note: setting the buffer size too low on older or slower computers, or on a computer that has not been
properly optimized, may result in poor performance. Always be sure to test the limits of your system before
attempting CPU-intensive tasks in mission-critical situations.