If you are recording a signal with your PreSonus audio interface and receive a recording that is too low or quiet sounding, please follow this guide to troubleshoot this particular issue.
What are you recording?
The first question to ask is: what are you recording? You'll want to make sure you are inputting the right type of signal into the right type of input. For instance, the AudioBox 44VSL device contains mic, instrument, and line-level inputs; because a line-level input requires a much stronger signal input than what a guitar could produce, plugging in a passive electric guitar to a line-level input would result in an extremely low recording.
Make sure that the source you are using, such as a mic, guitar, keyboard, etc., matches the type of input you are plugging it into on your interface.
Note: A common mistake is to not turn on 48V "Phantom Power" when using a condenser microphone. If you do not turn on 48V when using a condenser mic, you will receive little-to-none signal. Most interfaces, including all PreSonus interfaces only send 48V out through the XLR stage of the preamp, so if you are using a quarter-inch connection to the condenser, this will not work.
Check the Impedance
Even if you are using the right type of cable and connection from your source to input, there could be an impedance mismatch. Examine this article for more info on this issue.
Mic positioning
When recording using a microphone, you'll want to make sure you're using proper microphone positioning. You may wish to to speak closer to your mic, or check its documentation to find out whether or not it's an omnidirectional or unidirectional mic. If the mic is unidirectional, that means it receives audio best that comes in from a particular direction - you'll want to make sure you are speaking or singing into the mic using that reference.
Is the signal actually low?
It is easy to look at a professionally-mastered waveform and see that it "fills" space nicely, with big, fat waveforms and full sound, then look at your own recordings and see thin, "weak" sounding audio. Keep in mind that recording engineers do not actually record at this loud, compressed level - this additional amplification is done after the recordings have been made, in an effort to present a finished product that sounds full, loud, and professional.
In actuality, the recordings are usually made at around the -24db to -12db level, nowhere near the 0db floor. This leaves plenty of headroom to mix and work in, without having to worry about pushing the mix to the point of clip. Once the mix sounds good, additional compression and gain are typically applied to the master channel, boosting everything to the desired level of volume. Of course, there is variance in the amount of amplification needed - you probably wouldn't want to compress an audiobook track to the degree you would compress a track of electronic dance music.
Therefore, what you'll want to do is verify the level of your recording. It is easy to get caught up in the numbers, but what is most important is that the recording sounds clean and detailed. Even if the recording is low, it can be amplified after-the-fact with your DAW software. Rather than turning up the gain on your interface right away, simply turn it up to a level where audio sounds clean, record, and boost from there. Cranking up the gain on the interface can amplify the noise floor, causing static and white-noise sounds that are obviously undesirable.
Is there anything else?
Of course, make sure to check all your connections and cabling to ensure that nothing is being attenuated by physical issues. Testing your mics, guitars, and so forth with another interface or mixer can verify that they are properly outputting signal. If your interface has a "pad" feature, you may wish to disable it - a "pad" will apply additional resistance to the interface's input, resulting in a stronger signal being required to achieve the same volume of recording.
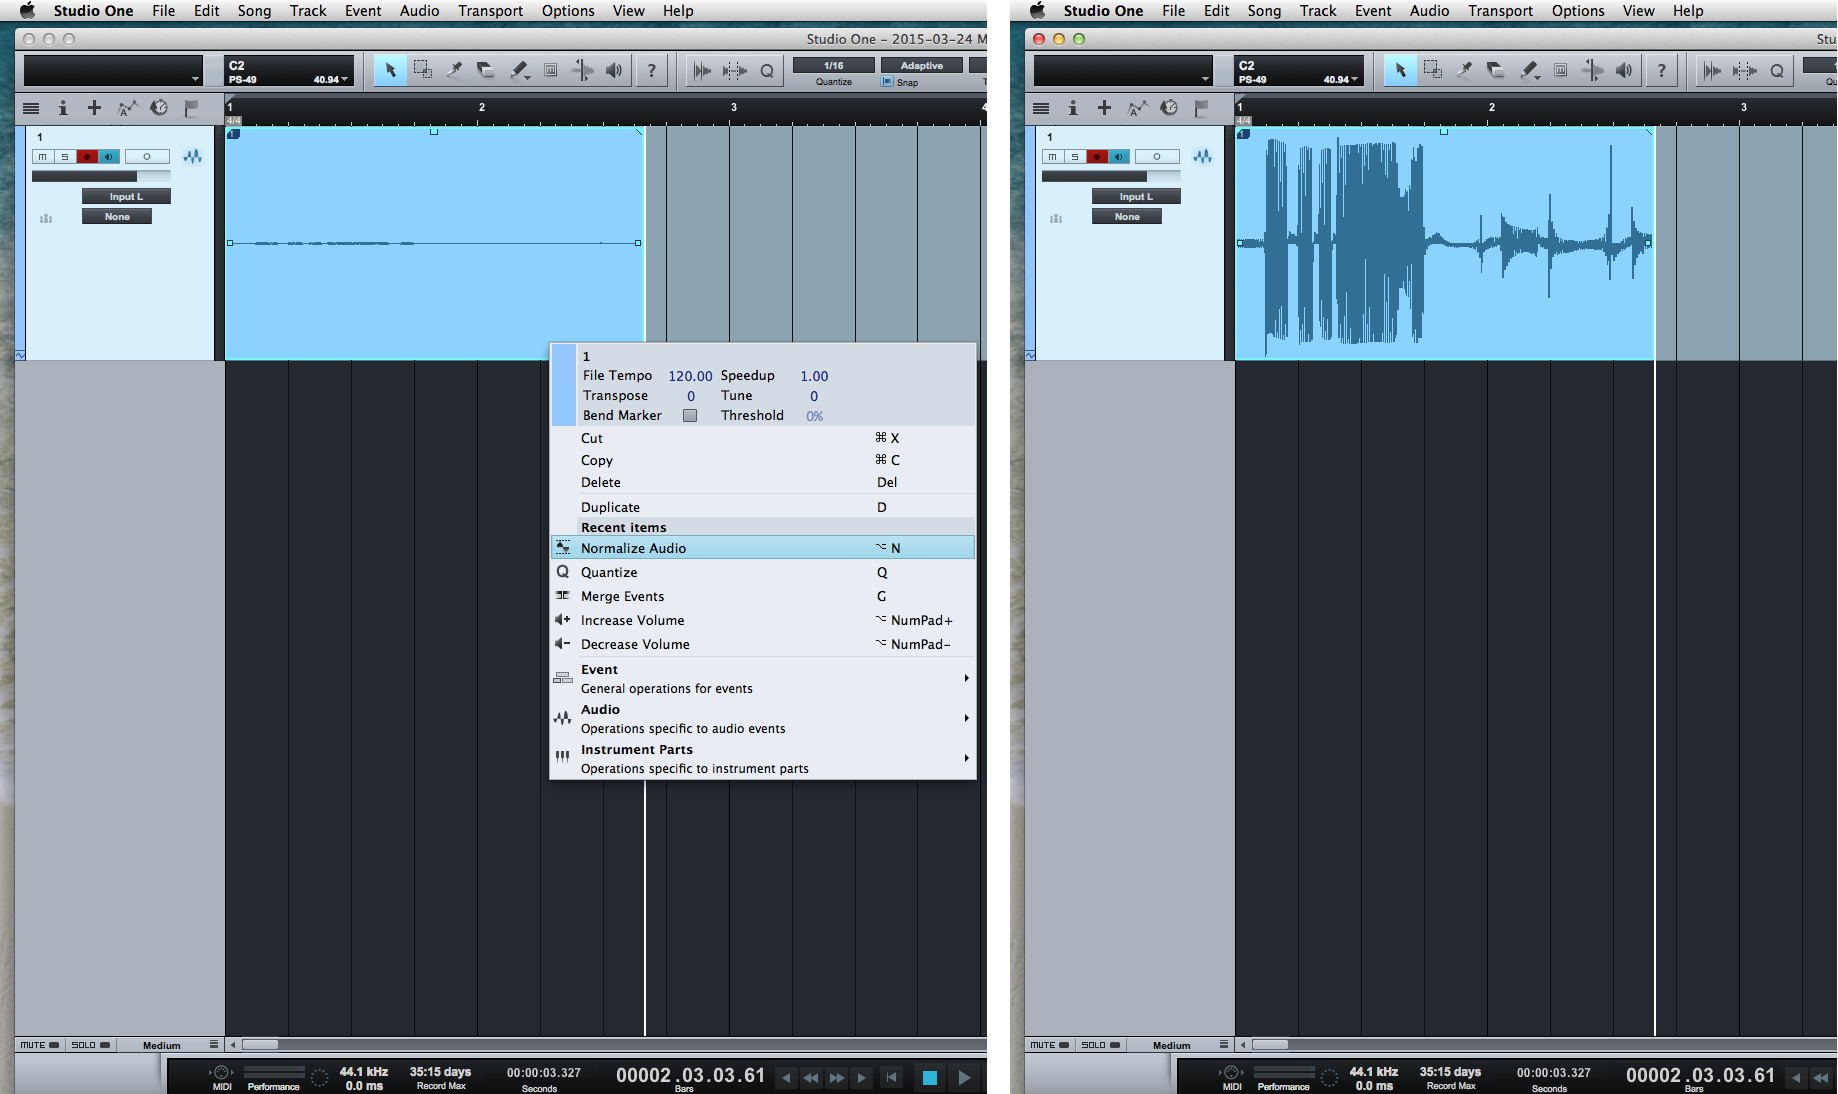
***NOTE: If you're using Studio One you can utilize the "Normalize Audio" function as seen in the screenshot below.
If you do not see "Normalize audio" in the same location as the screenshot below you will need to access it by opening the "Audio" drop down menu.
