StudioLive XX.4.2 Ai - Connections and Networking Page
For troubleshooting existing StudioLive Ai networks already setup,
pleaes see the troubleshooting information at the bottom of the page.
StudioLive Network connection types:
Firewire 800

There are two standard 9-pin FireWire s800 ports on the
back of the StudioLive. Either port can be used to connect the StudioLive to
a FireWire s800 port on your computer. Use the second FireWire s800 port to
connect additional s800 devices (such as external hard drives) to your computer.
***NOTE: The firewire port on the StudioLive Ai Series only deals with
Recording and VSL connection. All iOS devices need to be connected to an
802.11 (WPA/2) Wireless network through a Router to use UC AI and iOS devices
and do not have recording capabilities (wireless or wired ethernet).
Mac's should interface with onboard Firewire 800 ports or through the approved
Mac Thunderbolt to Firewire adapters. If you need to understand how to properly
connect a StudioLive mixer to a PC computer, please click this link here:
How do I properly connect my StudioLive to my PC?
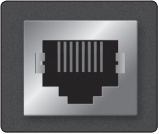
Ethernet Connection (RJ45)

This standard RJ45 connection has been included to hardwire your
StudioLive to a LAN network. By adding a wireless router to the network, you will be
able to wirelessly remote control your StudioLive from virtually anywhere. This is
especially useful when your wireless control devices (iPad, iPhone, or iPod touch)
must be used in a different room from where your StudioLive is installed, or if there is
quite a bit of wireless interference in your venue.
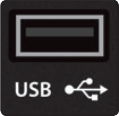
USB port (WiFi Dongle)

USB. The USB port is for use with the included USB WiFi dongle. This WiFi dongle will
allow you to connect your StudioLive AI-series mixer to a wireless network
(using a router) and remote control it using VSL-AI, SL Remote-AI, and QMix-AI.
The 2.4 Ghz adapter supplied with your StudioLive Ai mixer is the only supported
module for your StudioLive Ai mixer.
NOTE: This USB port can also do manual Firmware Updates for the Mixer.
The Firmware Recovery method are for resetting system settings and is also
can be done through this USB port.
When using the Wireless dongle for WiFi connection, the dongle will blink
green denoting that the connection has been made and wireless networks
can be discovered. If this light is not blinking, try using an extension or
more secure means of seating the wireless dongle.
If you are still having issues with the dongle, please contact Presonus
Technical Support for further assistance.
Pro Tip: For the best performance and to reduce the possibility of networking complications, we recommend choosing one network connection method or the other (either Ethernet or WiFi) and making sure to power on the mixer using only the chosen network connection method. Since the WiFi dongle is not hot-pluggable and since having two network connections active can cause connection problems, before turning the mixer on you should connect only the network connection you plan to use, so as to insure that the mixer boots with only one active network connection.
***********************************
Networking (Page 2) System Menu

This information can be found by pressing the "System" button on your mixer.
Each area of your System Menu >> Page 2: Network >> has different functions.
A. Selected: This is the current network you are connected to. When no network
is connected, the network name states "None." When you have connected Ethernet
to a router, you should see the word "Ethernet" listed.
B. Avail Networks: This will list the current available networks listed over Wifi when
the Wireless module is inserted and flashing on your StudioLive Ai mixer. For
problems seeing wireless networks, please refer to the troubleshooting guide below.
NOTE: Wireless networks are not necessary to connect to if Ethernet is connected.
Therefore, attempting to connect with no Wireless dongle plugged will give
errors and is unnecessary.
C. IP Number: This is the IP address given when your StudioLive mixer
is connected to a Wired (Ethernet) or Wireless (USB Wifi dongle) network. When
This is given, your mixer is connected to your network.
***********************************
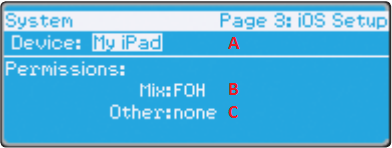
iOS Devices System Menu
Once an iOS device is connected to your wireless network and has launched
SL Remote-AI or QMix-AI, the device will be displayed in the Devices list on
the iOS Setup page in the System menu.
Once you have connected and configured an iOS device, the same
permissions will be set for that device every time you connect it.

A. Device: Each device will be listed using its device name, so you can
easily identify which device is which. This name can be changed in
iTunes or in the General>About settings on the iOS device. You can
cycle through devices using the value wheel in the Master Control.
B. Mix: This is the Permissions for the selected device.When setting
permissions for SL Remote-AI users, you will choose between
giving full access to all SL Remote-AI functions or providing limited
access to just a few aux-mix functions.
To remove all control from any iOS device user,
simply select “None” from the Mix field.
C. Other: Shows the selection of other functions which includes
the ability for that given device to change certain System Settings
(i.e. Channel Namming).
***********************************
For Assistance with Setting up or toubleshooting your StudioLive network for
UC Ai, SL Remote Ai and Qmix Ai, please see the Knowledge Base Article below:
StudioLive XX.4.2 Ai - Wireless Network Setup and Troubleshooting