Step 1 - Select MCU mode
To use your FaderPort 8 within Ableton Live you'll first need to ensure the FP8 is set to MCU mode.
- Power off the FaderPort 8
- Hold the first and second "Select" buttons on the FP8
- Power the unit back on
- Once the unit has powered up and displays "Select Control Mode" across the top of the scribble strips you can release the Select buttons
- Select "MCU"
- Press the eighth "Select" button ("EXIT" will be displayed on the scribble strip above this Select button)
You are now in MCU mode on your FaderPort 8 and will remain in MCU mode even if you power the device off. To change to a different mode execute the steps listed above but select a different mode (such as HUI or Studio One mode).
Step 2 - Open Live's Preferences menu
Once you've opened Ableton Live you'll need to access Live's Preferences menu:
- PC - Go to the Options drop down menu and select Preferences, or you can press Ctrl + ,
- Mac - Go to the Live drop down menu and select Preferences, or you can press Command + ,
Now go to the Link MIDI tab of the Preferences menu.
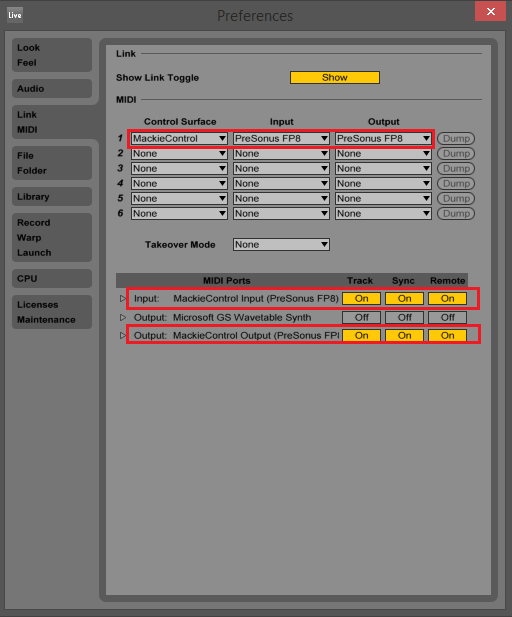
- Under Control Surface selet Mackie Control
- Select the PreSonus FP8 as your Input and Output
- Under MIDI Ports, toggle the Track, Sync, and Remote buttons to "On" for the PreSonus FP8
Your screen should look something like the image below:

Your FaderPort 8 should now be synced and ready for use with Ableton Live.