Video: How to setup a Monitor Mix
Creating custom monitor mixes is critical. If musicians can’t hear themselves or their
bandmates, their performance will suffer. A monitor mix can be mono or stereo. Most
often, an individual live monitor mix is mono and is sent to a floor-wedge or sidefill
monitor. (The obvious exception is in-ear monitor systems.) A studio monitor mix is
usually stereo because it is sent to a headphone amplifier that requires both a left-
and a right-channel input. In both cases, the function of the aux bus is the same.
Note that level differences on channels are based on the overall input level of the channel.
This means that if a channel on one input is louder than the other, the levels will be offset
even though the levels are the same on the Auxiliary output. Make sure nominally the input
On every channel is similar in gain structure.
To make sure you have correct levels inside of your signal, see this article here.
Be sure to follow the Manual of your StudioLive mixer found on the downloads page
on the proper connection of your speaker/headphone amplifier:
StudioLive Level Setting Procedures and Proper Boot Sequence
Different Headphone amplifiers suggested to connect your StudioLive with would be the following:
HP60
HP4
***************************************************************************
Little Overview about the Auxiliary Outputs on all StudioLive mixers:
The StudioLive mixer comes with Impedance Balanced Outputs that are able to take TRS
and/or TS connections and connect to any input on a Headphone Amplifier or Speaker.
The instructions below are designed to send a Mono signal out of one Auxiliary to feed
these types of inputs.

Note that headphone mixes will need to be connected to a device like our HP4
headphone amplifier in order to get Mono or Stereo mixes. Connecting
headphones directly to the mixer will not work correctly.
***Stereo mixes require 2 outputs summed in the external source you are using.***
***************************************************************************
As an example to get us started, let’s create a mono monitor mix on Aux 1 with sending
Channel 11 to that Auxiliary. Afterwards, you can reproduce on any channel inside of
the Auxiliary yourself.
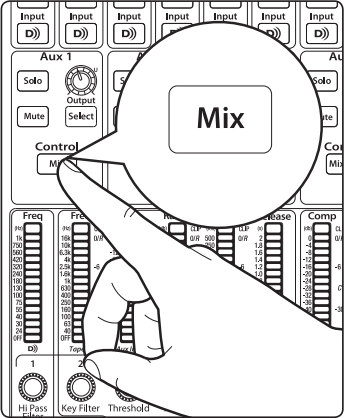
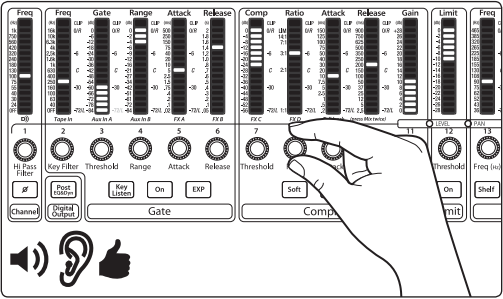
1. To begin, press the Mix button in the Aux 1 section. The Fat Channel meters will
display each input channel’s send level to Aux 1. The encoders below each meter
control (Fat channel meter) the channel’s level in the Aux 1 mix. Use these encoders the same way that
you use faders to set the output level to your main mix.
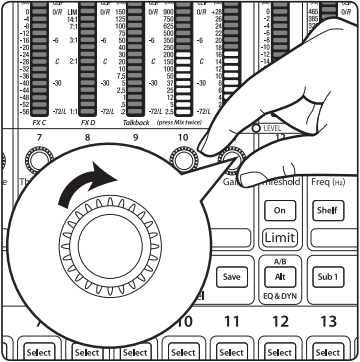
2. Using the meter section, locate the send encoder for Channels 11 and turn it to a little more than 50%.
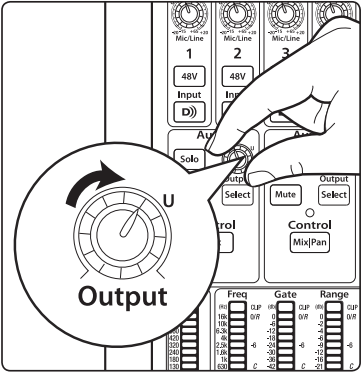
3. Turn the Output knob in the Aux 1 section to Unity.
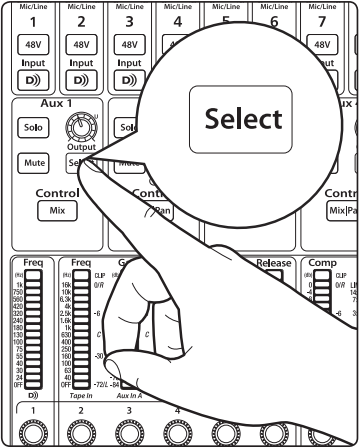
Side Note: By pressing the Select button for Aux 1, you can add dynamics processing
and EQ to the overall monitor mix. These are especially useful for eliminating
feedback in a monitor. Keep in mind that an equalizer can also be used to increase
the presence of an instrument by boosting that particular frequency range without
necessarily boosting the volume in the mix. This is great for getting the lead guitar to
cut through in the guitarist’s monitor mix and to provide that extra rumble in the
bassist’s mix.
If steps are followed correctly, and the speaker or headphone amplifier you are using is correctly setup,
then you should be hearing audio from a source plugged into channel 11 on your mixer. Be sure to
Connect your Speaker or headphone amplifier using the appropriate connections specified in the
manual of that said device.
If you need further Assistance, contact Technical Support.