Your StudioLive RM Series mixer can be updated by simply connecting a USB thumb drive loaded with the firmware files.
Please be sure to review all instructions before updating your StudioLive RM Series mixer.
NOTE: If using firmware version 5651 or later, all registered StudioLive AI mixers have the ability to connect to your My.Presonus account and download firmware updates directly over the internet. To check online for new firmware updates, simply connect your registered mixer to a network that has internet access, and then follow the instructions in steps 8 through 10 below, but without the USB thumb drive inserted. When you press Recall when no USB thumb drive is present, the mixer will automatically attempt to connect to PreSonus Update Servers and check for new firmware. If newer firmware is available, it will automatically download and install it with no further action necessary.
For using remote apps on Mac, PC, and iOS devices with the StudioLive AI mixers, please see our Compatible Routers list for more information on wireless routers PreSonus suggests. If you are still running into problems, then we suggest running the Firmware update using the USB method. Certain ISP routers and communication on certain networks can keep this from occurring and Technical Support may not be able to help you with these connections and updates.
***************************************
It is highly suggested that when doing firmware updates or the Firmware Recovery process through USB flash drives that you complete this process with a Sandisk drive as mentioned on the below knowledge base article. Not all flash drives will be able to complete this process correctly, and the suggested drives have been tested well to complete this process:
SanDisk Cruzer USB Flash Drive Compatibility with StudioLive AI
**************************************
NOTE: If you are updating your RM Mixer from firmware version 5844 or earlier, please be sure to watch the video link shown at the end of STEP 9, which shows the additional option card programming cycle that happens on the first reboot after the update.
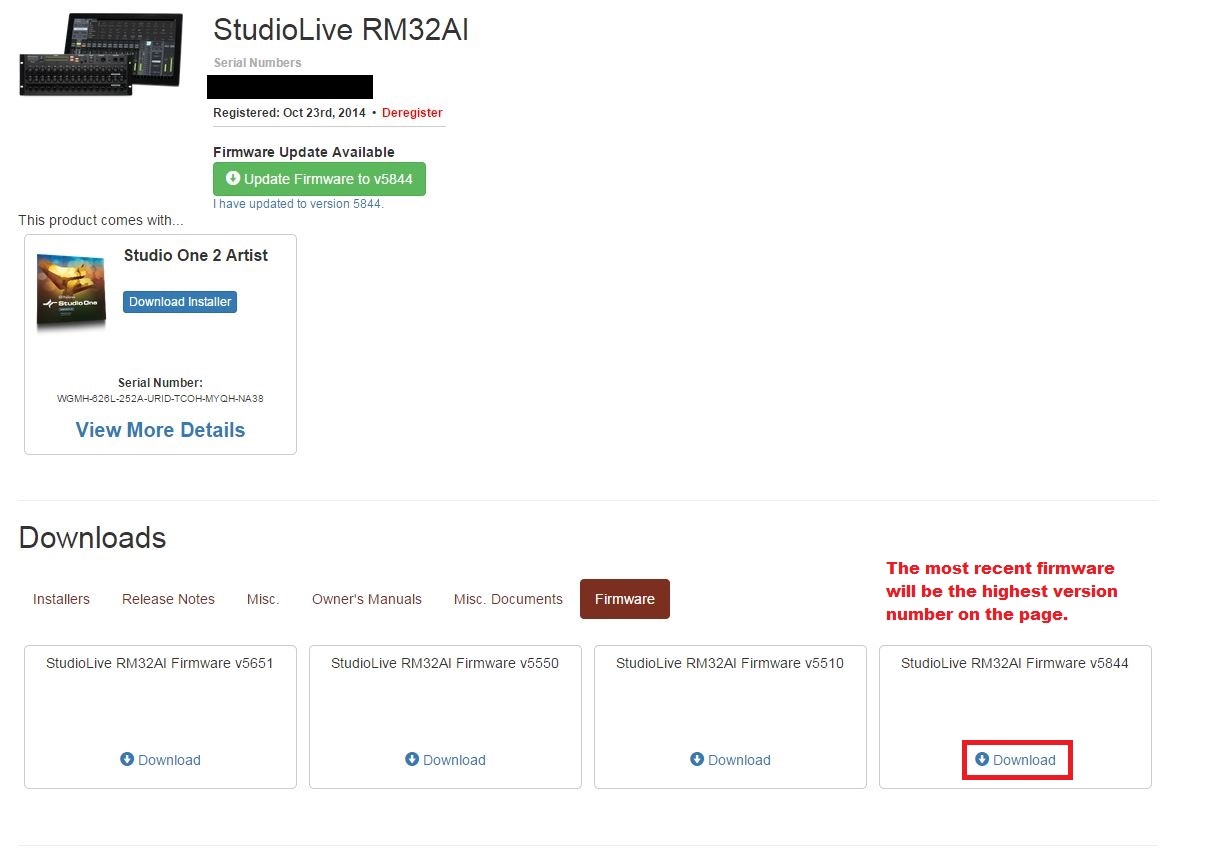
1. Download the firmware files for you mixer from your My Presonus account. To find these files, click on the "View More Details" link on your StudioLive registration and click the "Firmware" tab in the details area.
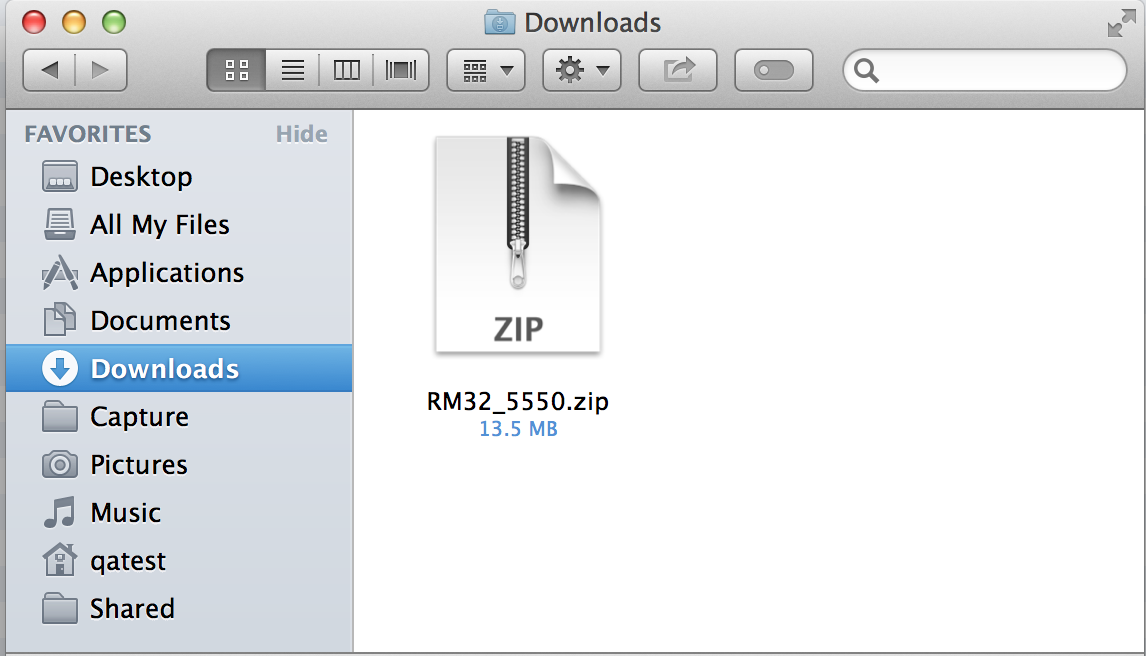
2. Open your “Downloads” folder and locate the downloaded firmware .zip file. The .zip file will be named with your mixer’s model number and the new firmware version (e.g., RM32AI_v5550).
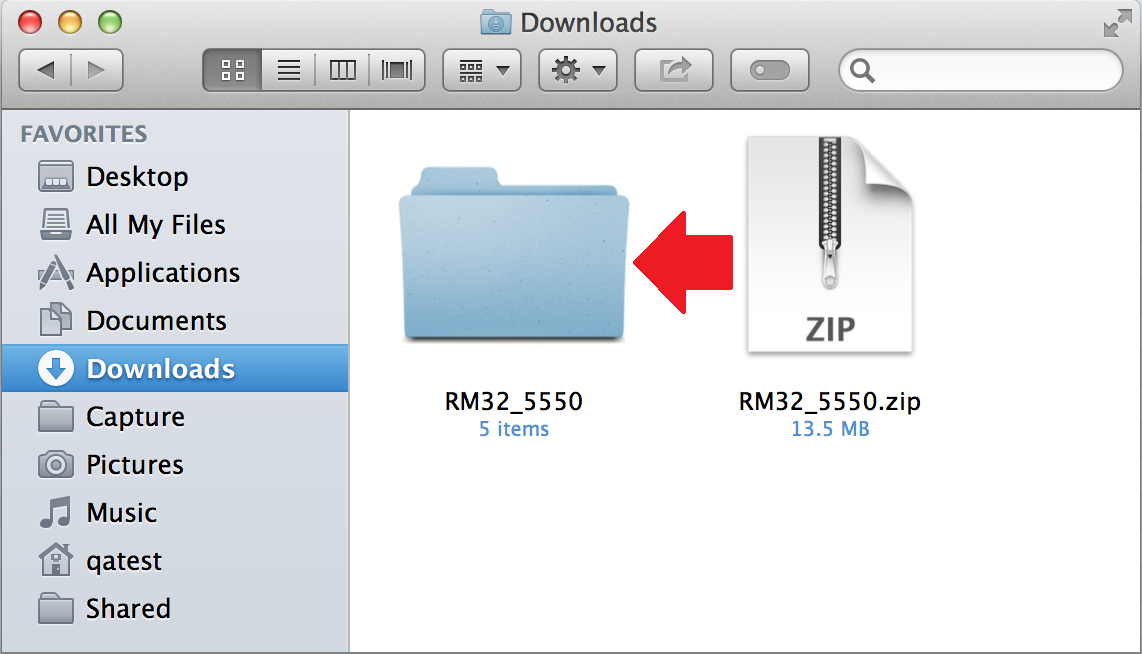
3. Depending on your system preferences, the firmware folder may not automatically uncompress from the .zip file. To expand, simply double-click it.
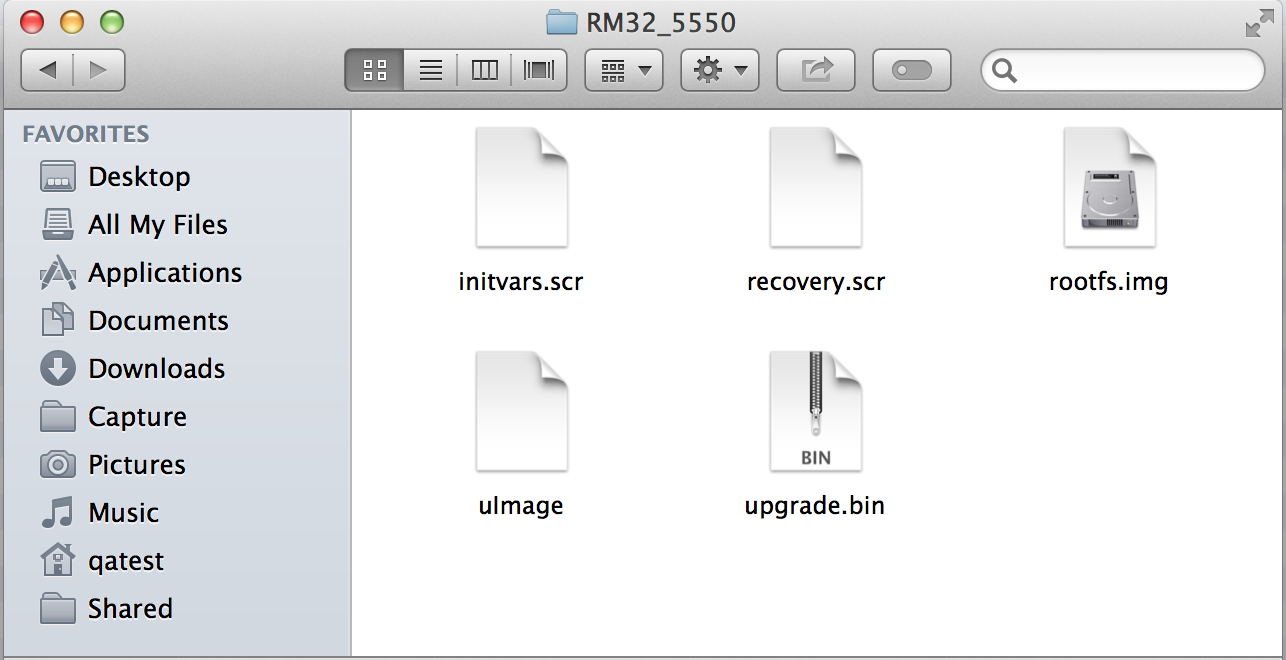
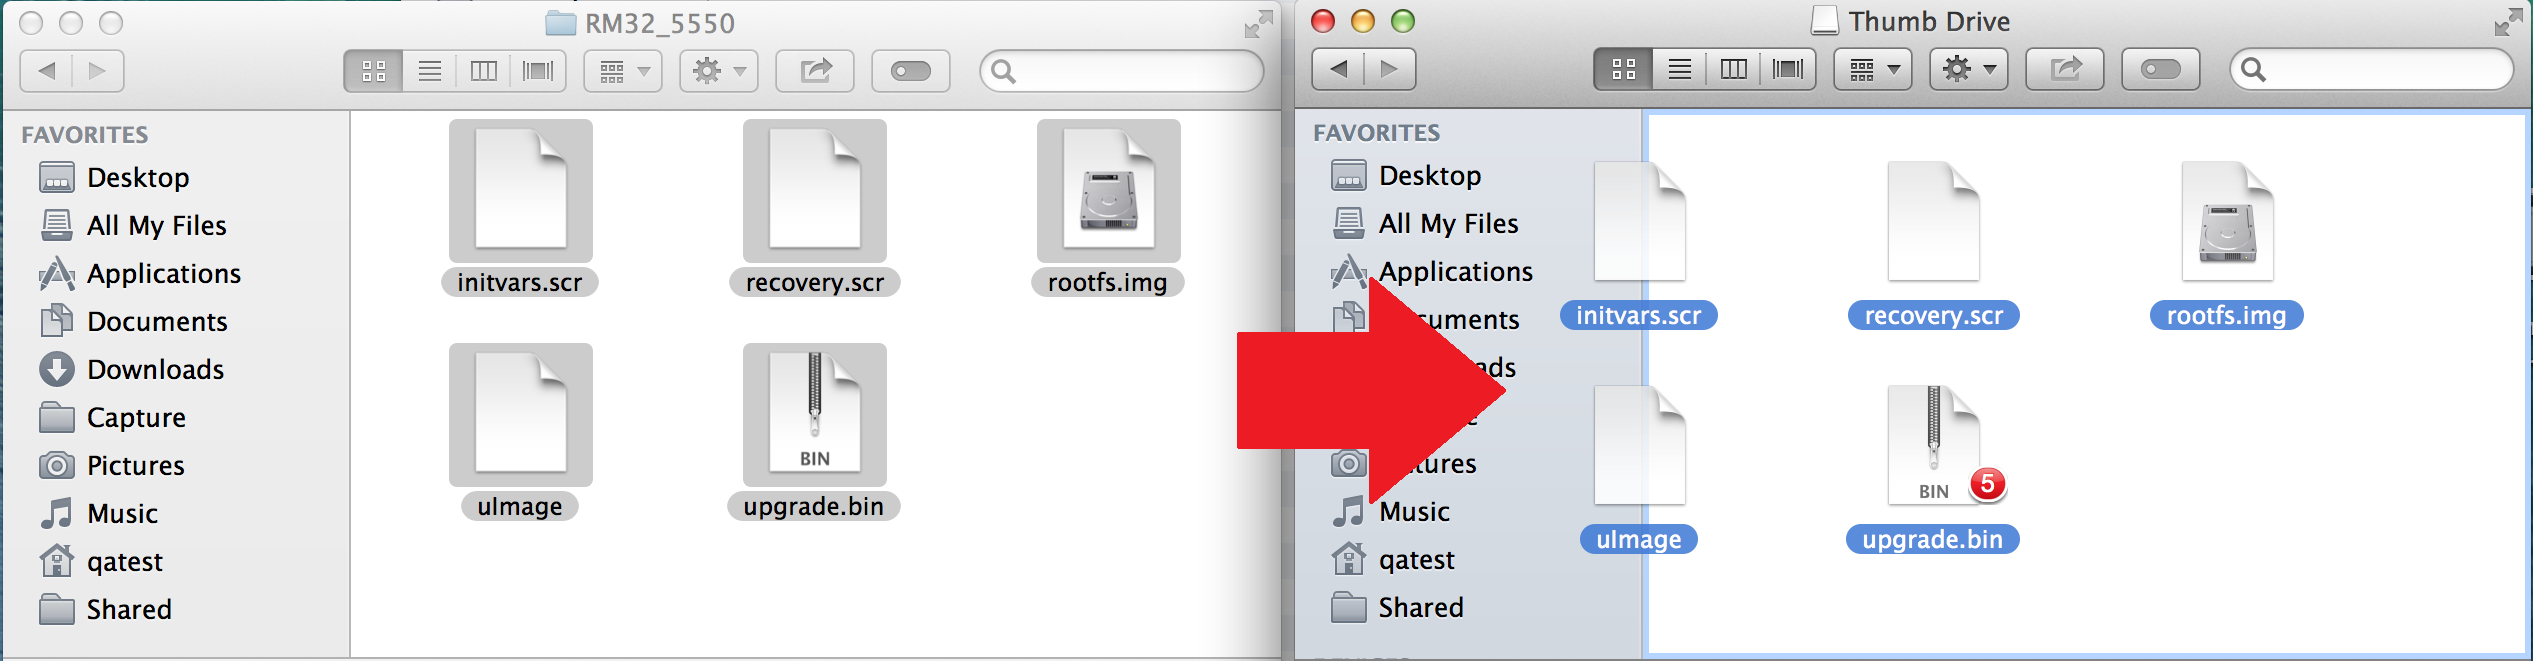
4. Open the firmware folder; you will find five files inside:
– Initvars.scr
–Recovery.scr
– Rootfs.img
– uImage
– Upgrade.bin
You will need all five files to upgrade your mixer.
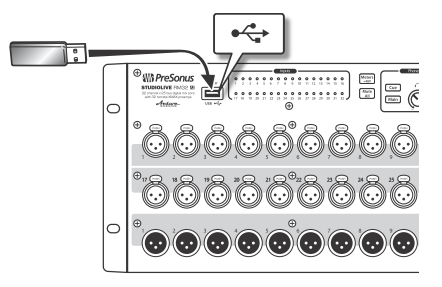
5. Connect a FAT32-formatted USB thumb drive to your computer.
Power User Tip: Most small USB drives (16 GB or less) are already formatted correctly, so no formatting is required. If your mixer does not detect your thumb drive, verify that it is formatted correctly.
6. Select all five firmware files and either copy/paste or drag them to the root of your thumb drive. Eject your drive and disconnect it from your computer.
7. Remove your WiFi Lan adapter (if inserted) and insert the thumb drive into the USB slot on the front of your RM Series mixer (Power on the mixer if it is not already on).
NOTE: In order to control the mixer with UC Surface, you will need either a network connection or a firewire connection to the mixer. Making a wired network connection to the RM mixer is described in section 3.3 Wired Ethernet Control Setup. Connecting the mixer to a computer using Firewire is described in section 3.5 Computer Recording Setup.
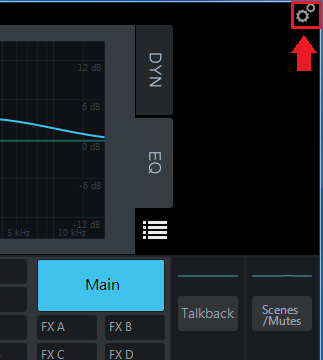
8. Once you have physically connected your mixer to your network or computer, open UC Surface and connect to your RM Mixer. Click the Settings icon at the top right of the UC Surface window (gears icon). Under the Device Settings Tab, click “Check Firmware Update”.

9. The update process will take about a minute to complete. When finished you will be prompted to power-cycle the mixer.
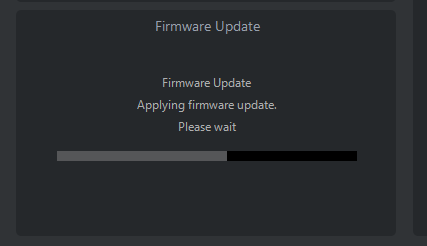
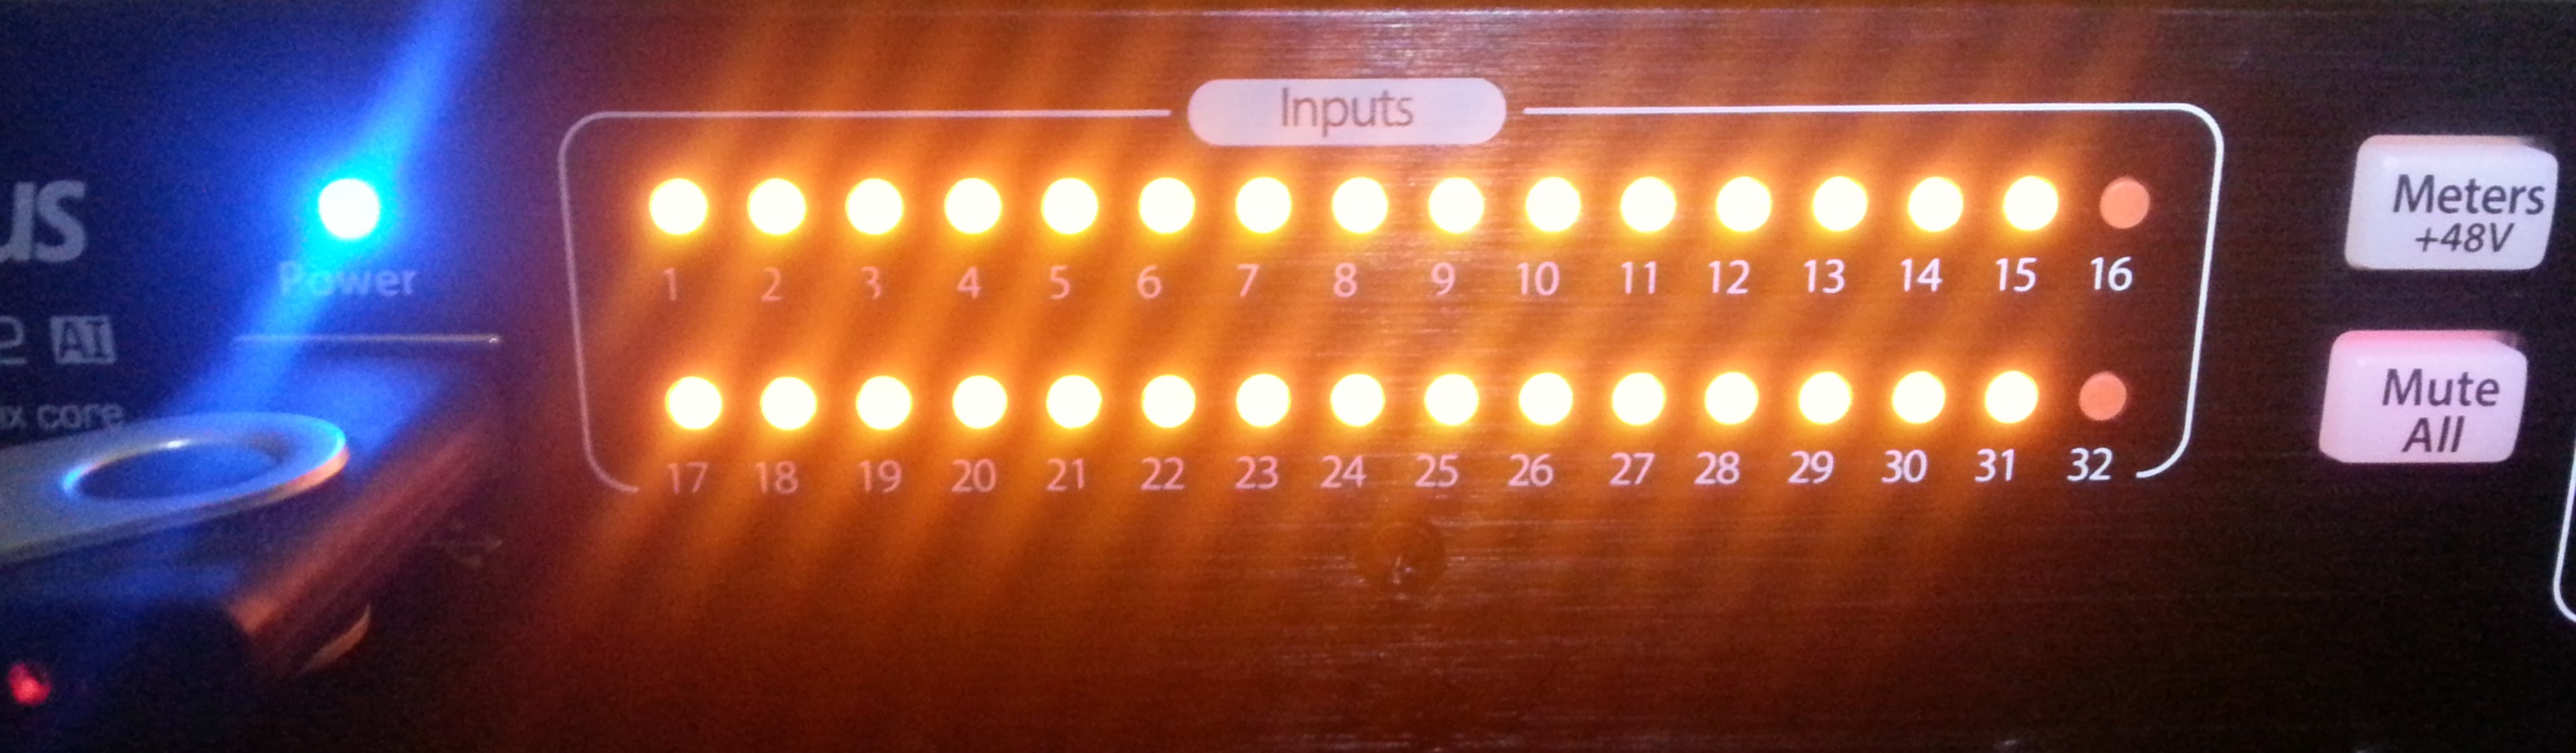
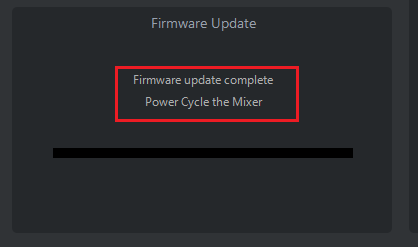
PLEASE NOTE: Once you have power-cycled the mixer after the initial firmware update step, it may need to finish some final components of the firmware update. If this is the case, you will see the Channel LEDs on the front of the mixer illuminate amber from left to right as this is done. This can take up to 10 minutes to complete so please be patient. Once the final portion of the update is complete, all the Channel LEDs will illuminate green. When you see this, power cycle the mixer. This process may occur several times depending on what firmware version you are upgrading from and to. If your mixer does not do this, do not be alarmed as it may not be necessary for this particular update.
NOTE: The following video will show what to expect as your RM Mixer boots for the first time with AVB-enabled firmware (when updating from firmware 5844 or earlier):
10. Restart UC Surface, revisit the Device Settings Tab in the Settings Menu and observe the firmware version shown. The last four digits of the firmware version reported there should match the version of the files you downloaded for your mixer.