The "Talkback" switch, for Presonus audio interfaces that support it, can be freely assigned to a keyboard shortcut or midi CC command. This makes it remotely controllable via keyboard or midi controller.
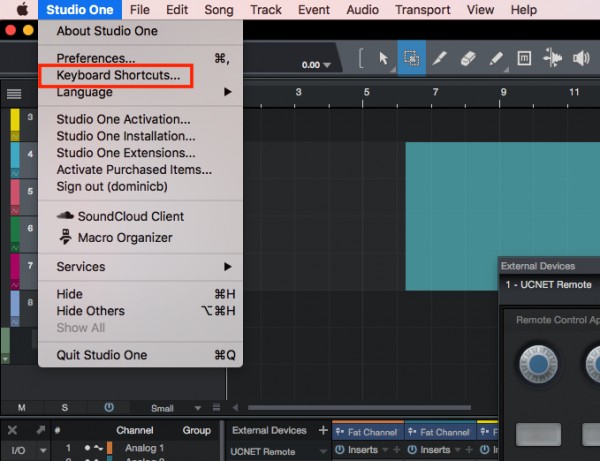
To assign "Talkback" to a keyboard shortcut simply open the "Keyboard Shortcuts" menu located under the "Studio One" title in the menu bar of Studio One.

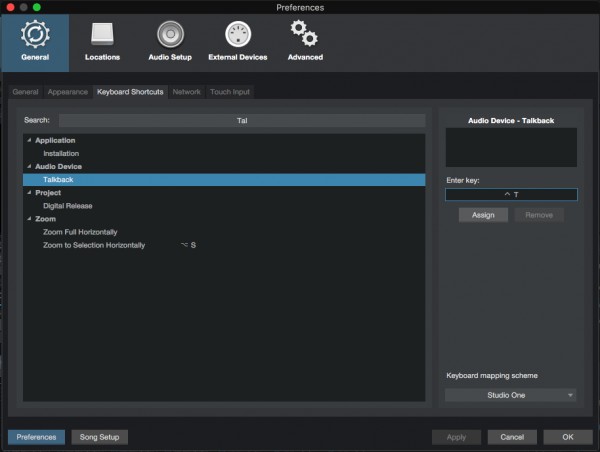
You will be presented with the Keyboard Shortcuts window.

Now type in "Talkback" in the search. You will see the command for "Talkback" listed. Select it, then on the right side of the window you can type in the keyboard shortcut you want to use. If the shortcut you type is currently assigned to something else, select another key command, if not, you can click the "Assign" button to complete the assigning of the key command to the "Talkback" function.
You are now able to toggle the Talkback function of your audio device using this keyboard shortcut command.
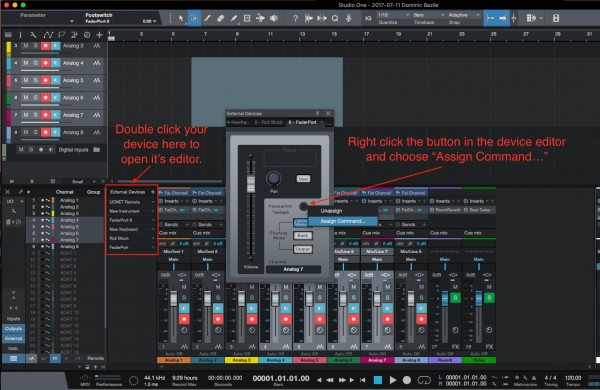
To assign the "Talkback" function to a midi CC controller, you will need to open the device editor for your device. Your device must already be set up as a controller via the Studio One "External Devices" menu. Please refer to the manual for setting up your device.
Open the device editor by double clicking the name in the "External Device" panel of the Studio One mixer. If you do not see this list as shown below, you will need to click the word "External" on the left hand side of the Studio One mixer.
With the device editor open of the device you want to assign, right-click the button you wish to assign and choose "Assign Command." You will be presented with a small command list window. Type in "Talkback" in the search bar and select "Talkback" as the command you wish to assign. Then click "OK" to commit to the assignment.

Your midi controller is now setup to enable or disable the Talkback via this controller switch.
This works well using a Faderport or Faderport 8 with a footswitch!