This is a multi-part tutorial, please read through it first before attempting to understand all the steps.
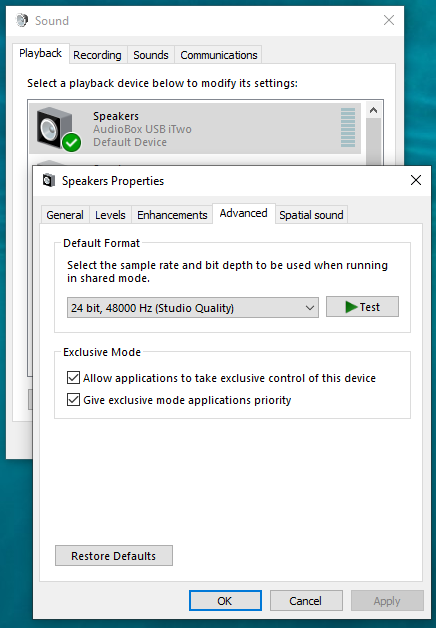
The key to making this work is to make sure the sample rate for both Windows and Studio One (or your DAW) are the same.
Some setup is required to make this work. This only applies to Windows users. Mac OS X already works without these extra steps.
- Open Windows Control panel and go to Sound settings to make note of the sample rate windows has the interface selected, default is 48KHz

- If you want to work at a different sample rate in Studio One, change your Windows sample rate now and/or click OK
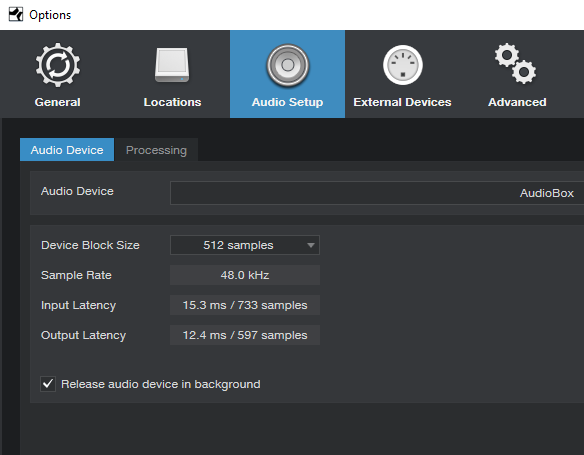
- Open Studio One and make sure the sample rate for the session you're working in is the same as what Windows was set to, be sure to save the session at this sample rate.
- Open up Song Setup and select Audio Tab.
- Check the box for "Release Audio Device in Background" and click OK.

- Save Your Session and close Studio One.
- Unplug your USB interface, and plug it back in to reset the device driver.
- Open your browser and start to play your YouTube video
- Open Studio One (or other DAW)
- When you click on the browser your audio in Studio One will stop (this is to be expected)
- Click Play on your YouTube video and then click Play on Studio One,
The two will now play audio at the same time.
Optionally if you're watching tutorials, you'll have a split screen with 2 windows, when you click on your browser the audio in Studio One will stop however the YouTube video will continue to play. This is normal. Clicking play on Studio One won't stop the YouTube audio.