We have partnered with third-party software manufacturer Celemony to bring you one of the best tools for production work in the business. The following will guide you through installing and authorizing Celemony Melodyne.
Celemony Melodyne Essential (NOTE: only with Studio One 2 Professional Customers!) The key that was used for Studio One v2 Professional will transfer and be usable automatically with Studio One 3 Professional's integration with Celemony. There is no need to claim and install a new Melodyne Key if you're upgrading from Studio One 2 Pro to Studio One 3 Pro. For all others please continue reading.
Here are the complete instructions for installing your Melodyne software into Studio One 3 Professional.
1. Log into your PreSonus.com account: https://my.presonus.com/auth/login
2. Click on the "My Products" menu option and select the "Software" tab and locate the Studio One 3 Professional listing of software in your list of registered software.
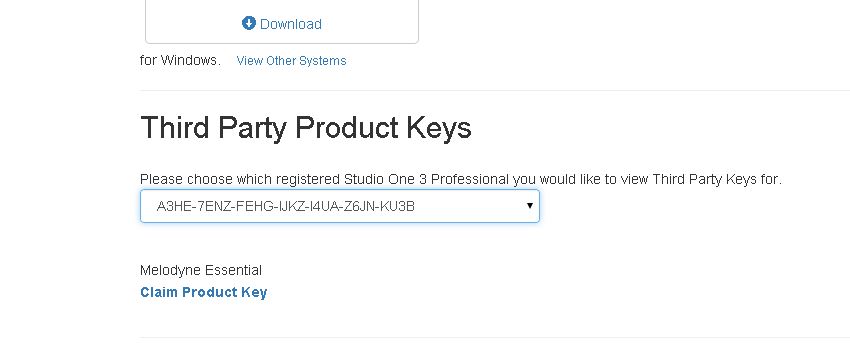
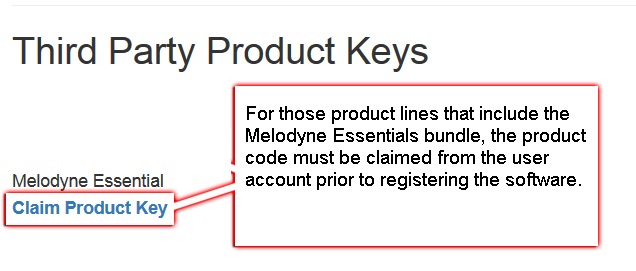
3. Under Third Party Product Keys (you will have to scroll down the page to locate this section), you will see a listing Melodyne Essential and a button that says Claim Product Key, click the "Claim Product Key" link to reveal the Melodyne product key, copy this key (CONTROL + C on PC or COMMAND + C on Mac).
4. Go to Celemony's website: http://www.celemony.com/cgi-bin/WebObjects/LicenseApp
5. Create a user account with Celemony. One of the first steps will be them prompting you to enter the Melodyne Essential Product Key. Now is the time to Paste (CONTROL + V on PC or COMMAND + V on Mac) the Key that you copied back in Step #3.
6. After your account with Celemony has been created, you will be shown Download links. Choose the correct one for your particular host computer's Operating System environment.
7. A customized .zip file will be created for you by Celemony's server computers. You should then see progress in the download of that .zip file (it should appear as something similiar to this: "Melodyne singletrack.#.#.#.[Your Celemony Account Username]"
8. Unzip and run the Setup file.
--> Windows 7: http://windows.microsoft.com/en-us/windows/compress-uncompress-file...
--> Windows 8: http://windows.microsoft.com/en-us/windows-8/zip-unzip-files
--> Mac OSX: http://www.macworld.com/article/1166403/unzip_almost_any_archive_fi...
9. IMPORTANT NOTE: Run Melodyne as a Stand Alone without opening Studio One 3 Pro.
10. It should automatically Activate the Melodyne Essential software.
11. Your Celemony Melodyne Essential software will now be up-to-date and ready to use as a Standalone software program or within Studio One 3 Professional.
Now that we've got this done, we can move on to Installing Add-Ons (also known as Extensions) in the tutorial aptly entitled:
Getting Started with Studio One 3 Step 7: Installing Studio One Add-Ons.