PreSonus delivered a new update on August 2, 2016 for the AudioBox VSL Series devices that will uninstall old VSL software from your OS X system. You can obtain this new release by downloading Universal Control 1.8 on the product download page:
AudioBox 1818VSL driver download
AudioBox 44VSL driver download
AudioBox 22VSL driver download
Be sure to read the release notes about how the uninstaller works before running it.
If you would still prefer to do a manual uninstall, and you want to be 100% certain AudioBox VSL 1.1, 1.2, or 1.3 files are removed, this tutorial will walk you through the manual process of file removal.
Please follow each step to guarantee success. This will take about 10 minutes (or less) to complete.
First you’ll want to open up your computer's folders so you see the following folders:
- Applications
- Library
- System
- Users
On your Mac click on the Apple Finder Toolbar, click on Go, then select Computer.
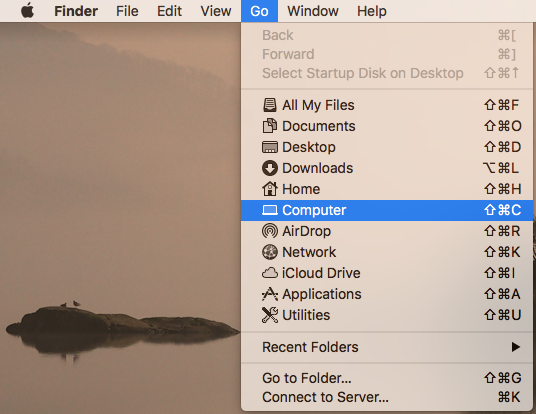
Open the Applications folder
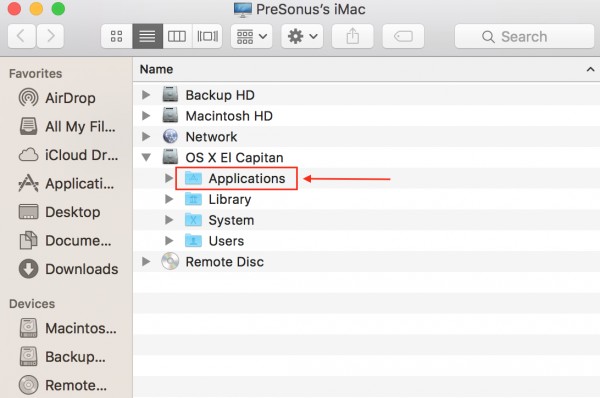
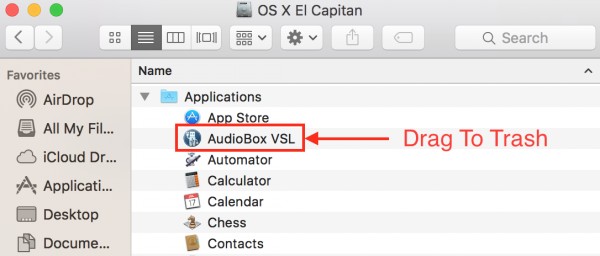
Find and delete AudioBox VSL in the Applications folder.
You can drag it to the trash or (Ctrl + Click) and select Move To Trash.
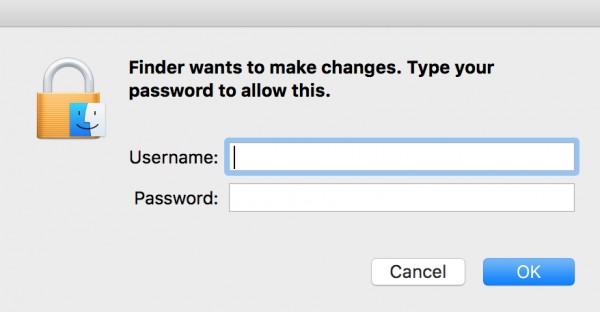
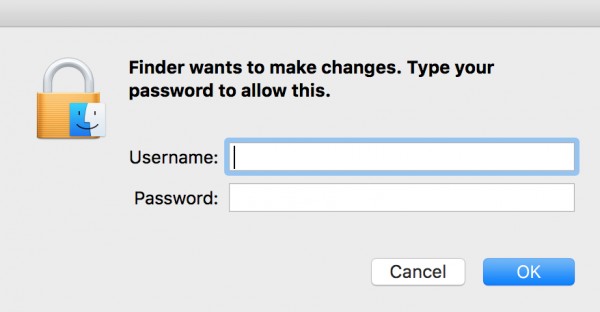
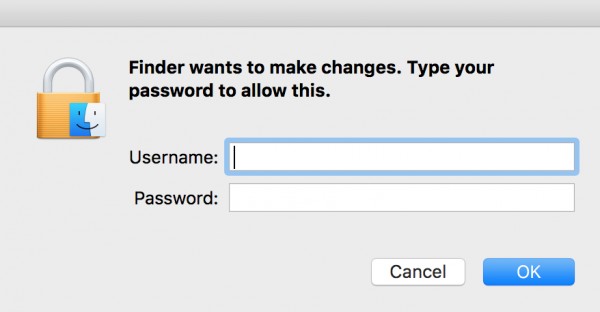
You’ll be prompted for your username and password.
Next:
Open up the Library folder.
-----> Open Application Support
---------------> Open PreSonus Folder
-------------------------> Open Devices Folder
-------------------------> Delete the ‘audiodevice.bundle’ file
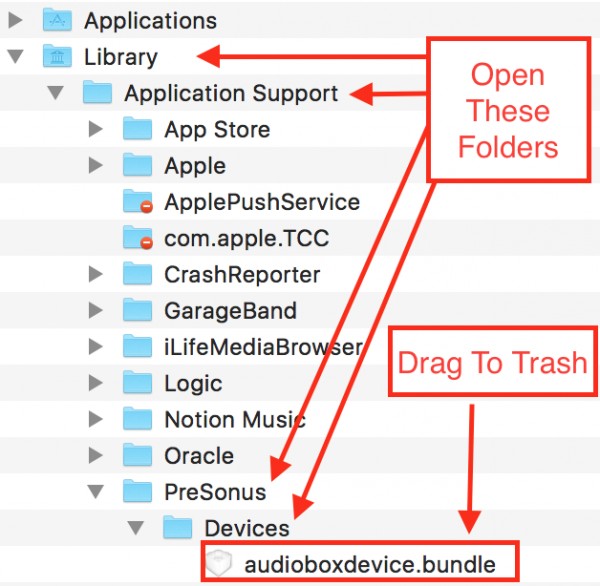
You will again be prompted to type in your password.
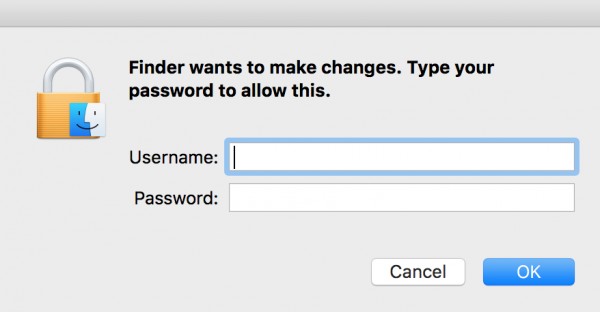
In OS X device drivers are called Kernel Extensions, or kext for short.
Now we need to delete the actual device driver files.
Open your System Folder
----------> In the System Folder open the Library Folder
--------------------> Inside that folder is the Extensions Folder
Delete these two files:
- PreSonus_AudioBox_VSL.kext
- PreSonus_AudioBox_VSLdsp.kext.kext
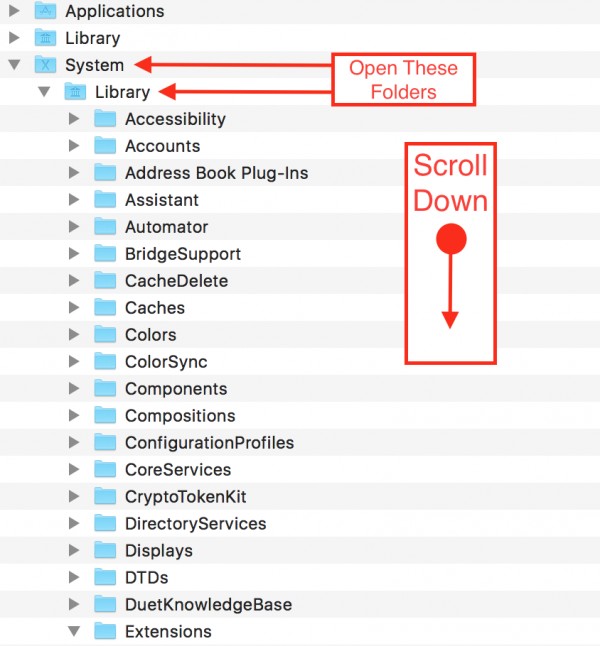
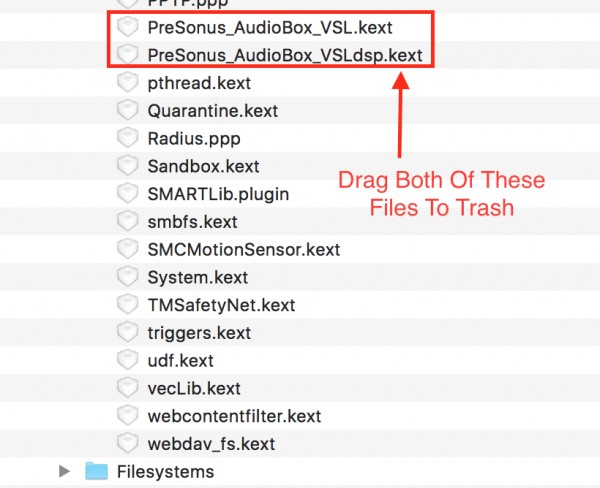
You will again be prompted to type in your password.
Close all the windows you have open on your desktop.
Now we need to go to some hidden folders.
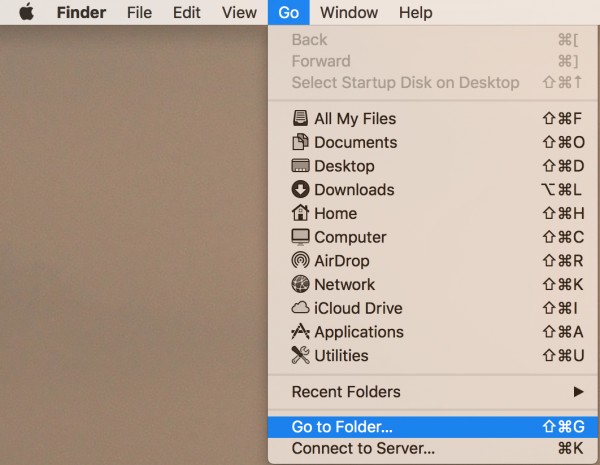
Click ‘Go’ on your toolbar, then select ‘Go To Folder’
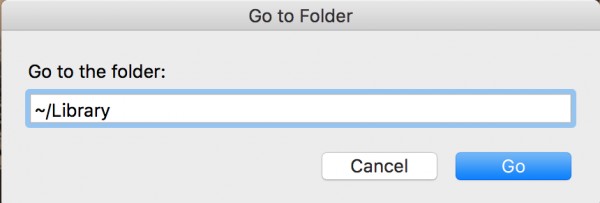
Type ~/Library into the field "Go to the folder:" and click "Go".
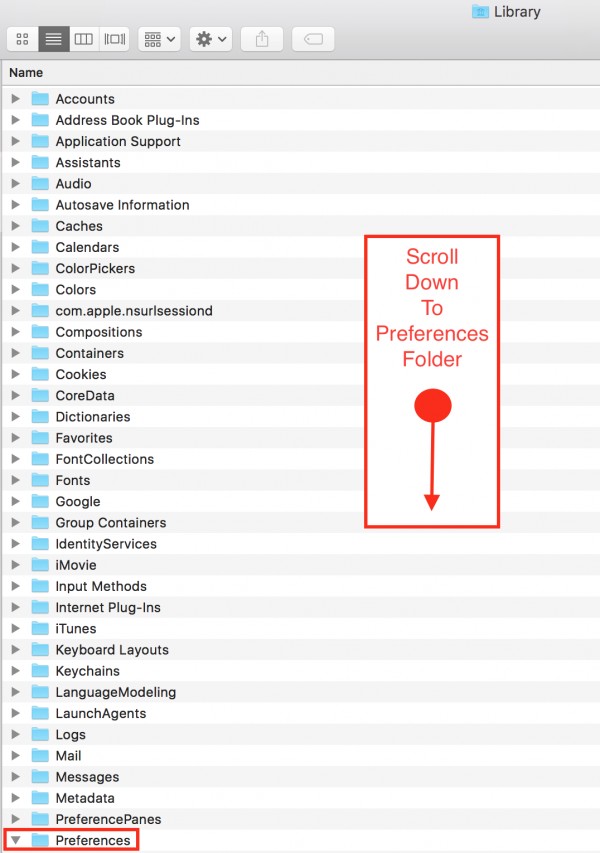
This folder only appears for Mac OS X 10.7, 10.8, 10.9, and 10.10.
10.11 does not allow installation of this folder so you may not see it if you did a clean install of the OS. If you don’t that’s ok. Skip to the next step.
If you did an upgrade from a previous version of OS X, you may see it, please follow along and remove these files as instructed.
In this Library folder which is different than the one listed previously.
Scroll down and select the PreSonus folder and remove the following files:
-
AudioBox Folder
-
AudioBox (x64) folder
Now inside the CCL Cross-platform Framework are two files you need to delete
if those are the only two files in there, you can delete the folder.
System may not ask you to enter your password here when you delete these files.
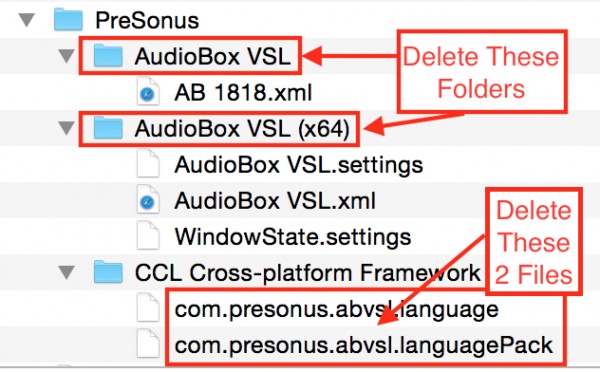
Now close that window.
Click on the toolbar in the finder again.
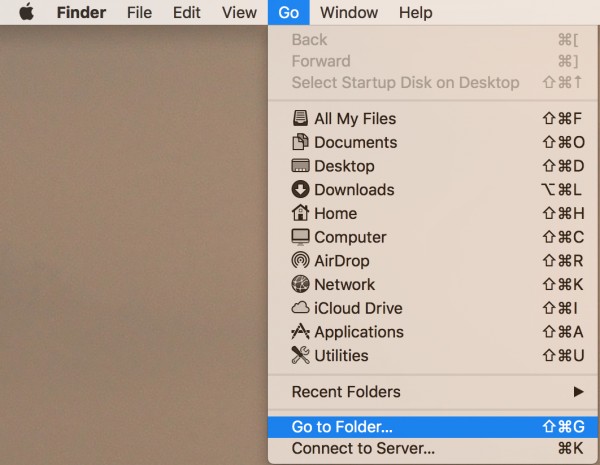
This time we are going to another hidden folder.
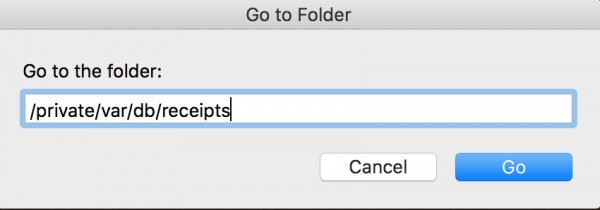
Type in what is shown here into the field for "Go to the folder:"
/private/var/db/receipts
and click "Go"
Scroll to the bottom of the list of the 'receipts' folder.
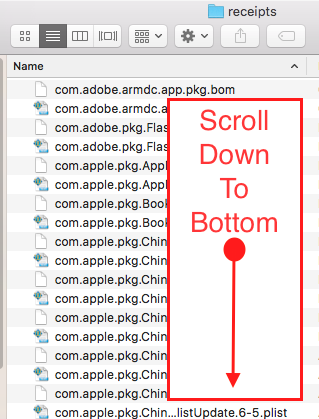
Find and delete the following two files:
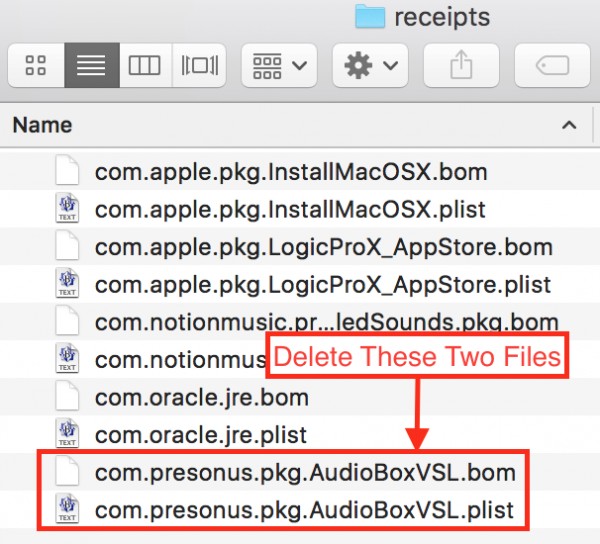
You’ll need to enter your username and password again to authorize deleting the files.
You can close all the windows on your desktop.
We need to do a couple more items before we’re done.
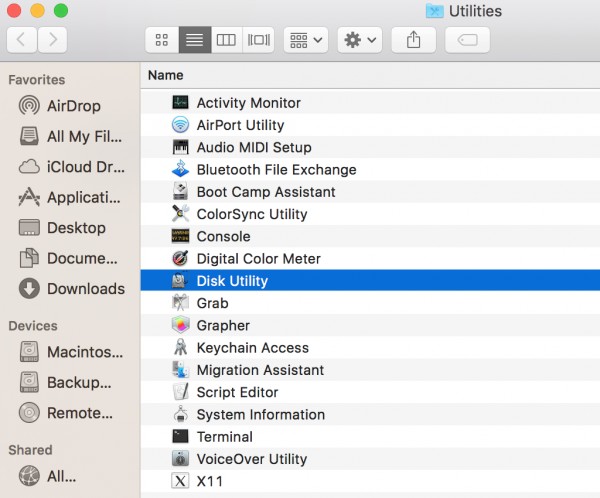
We need to run Apple Disk Utility found in the Applications / Utilities folder to clean up the file system.
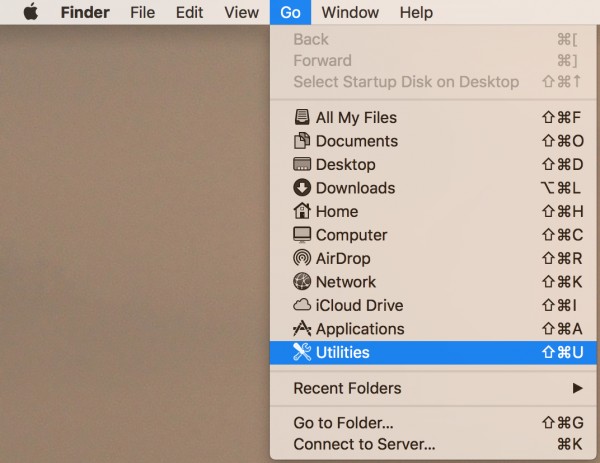
Then double click 'Disk Utility' to launch it.
Apple changed this screen for Mac OS X 10.11 (jump to the next step if you’re on any version of Mac OS X 10.10 or earlier), if you're already on Mac OS X 10.11, this next screen is for you.
El Capitan 10.11 - Disk Utility
For El Capitan (and presumably future OS) all you need to do is select your hard drive (or ssd) and select First Aid.
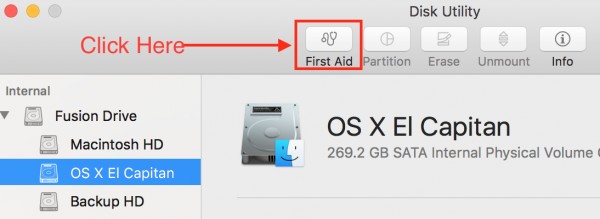
This can take several minutes to complete depending on the speed of your system, the size of your hard drive and if you've never done this before. Click "Run" to start.
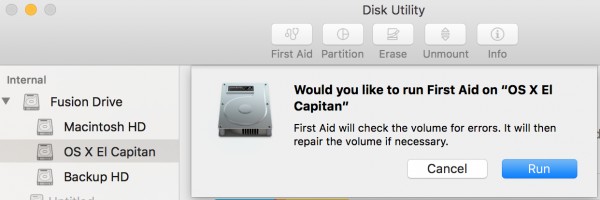
Click Done when complete.

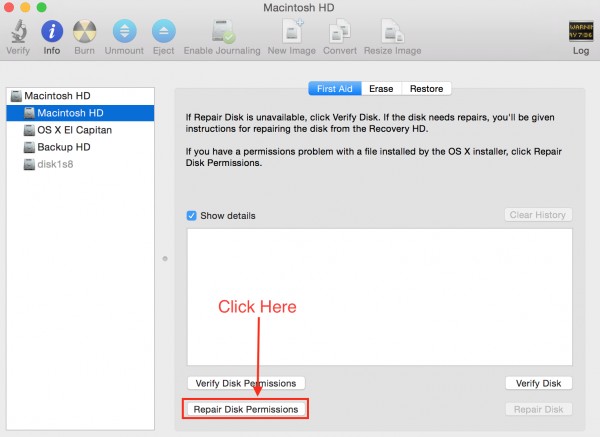
Mac OS X 10.10 - Yosemite (and prior OS X versions) - Disk Utility
In this version of Disk Utility, select your sysem partition on the left column.
Then select ‘Repair Disk Permssions’ at the bottom of the screen.
This will take several minutes to complete.
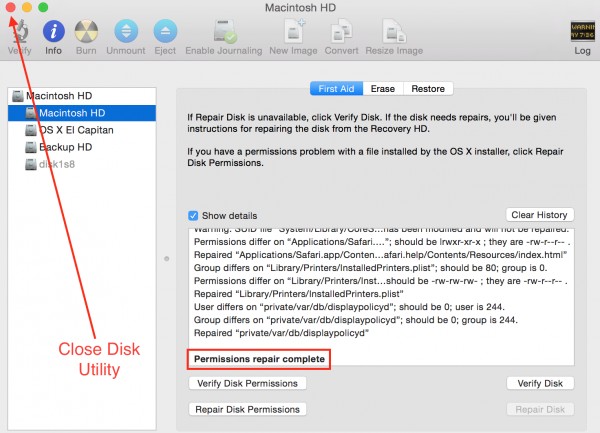
When Permissions Repair Complete appears, close Disk Utility.
Resetting PRAM
The next step requires a reboot of your system.
To reset the PRAM you need to first ‘Restart Your System’
As soon as the screen goes dark, hold down these keys simultaneously.
You can let go after you hear the startup sound a 2nd time.

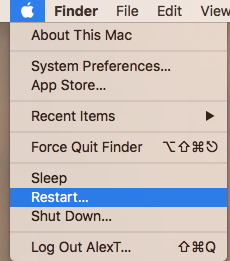
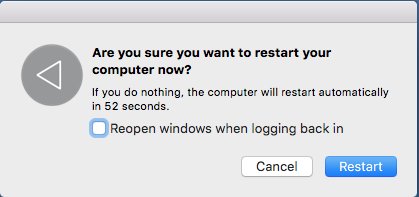
If you have a mutli-boot system, you will end up at the Macintosh HD after the restart, you may need to reboot again into the OS you were previously in.
Your system is now removed of the AudioBox VSL software.
Audio MIDI Setup
We need to check to see that the AudioBox (22VSL, 44VSL or 1818VSL) is showing up correctly in your system.
On the Toolbar, select Go, then Utilities.
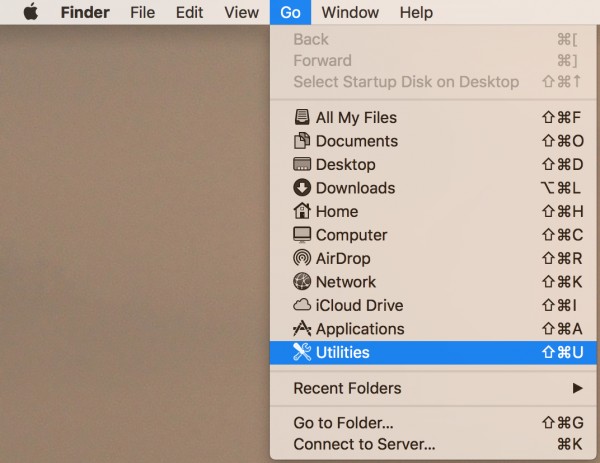
Then double click 'Audio MIDI Setup' to launch it.
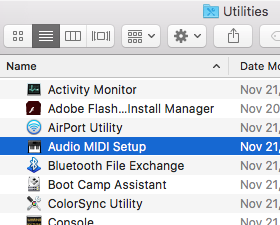
Your AudioBox (VSL) should now appear in the list of devices on the left column.
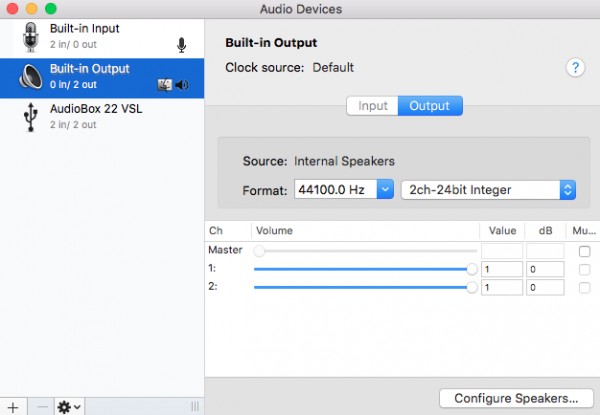
However, it is not set as the default Input (Recording) and Output (Playback) device.
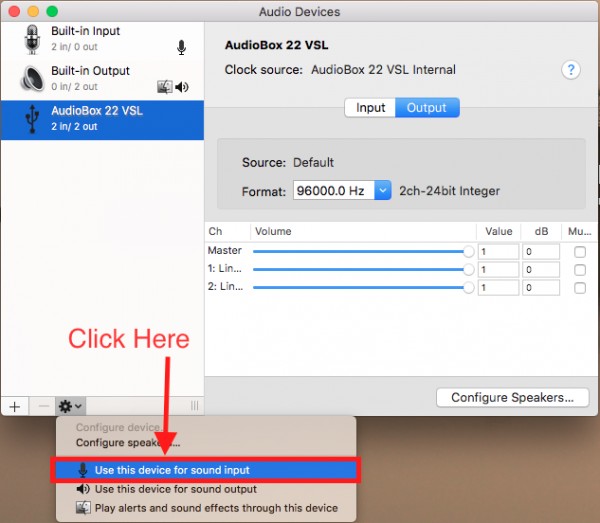
At the bottom of the screen click on the cog wheel with a down arrow and select to "Use this device for sound input"
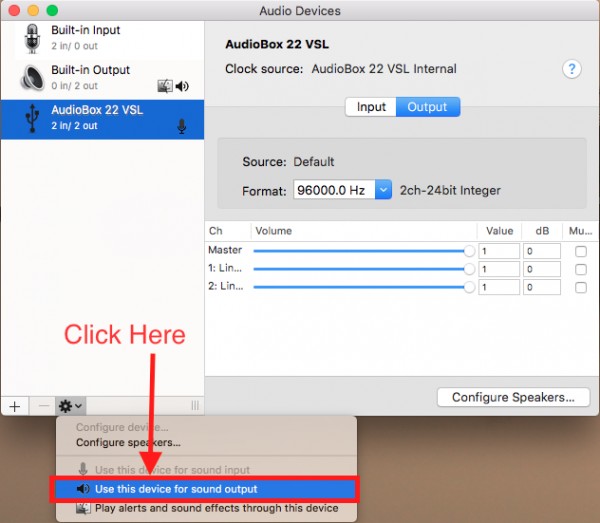
Then again, At the bottom of the screen click on the cog wheel with a down arrow and select to "Use this device for sound output"
Now your AudioBox (VSL) is setup correctly.
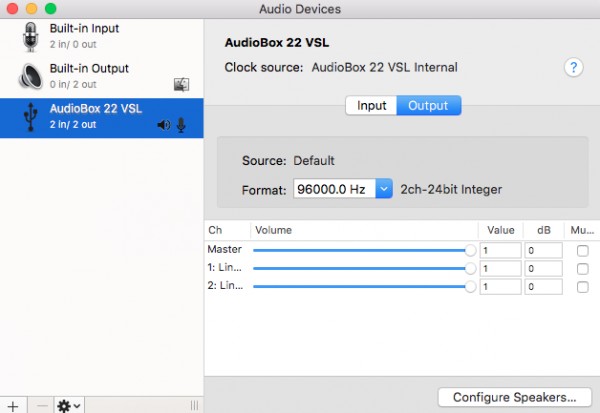
You can now exit Audio MIDI Setup and Close the Utilities folder.
System Preferences - Sound
We can also go to System Preferences to check that it’s showing up correctly.
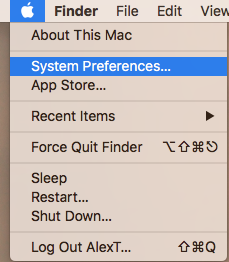
lick on the Apple in the Finder Toolbar and select ‘System Preferences’
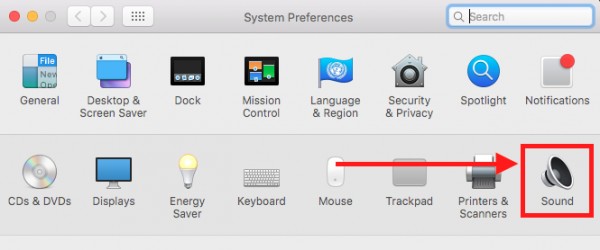
In System Preferences click on ‘Sound’
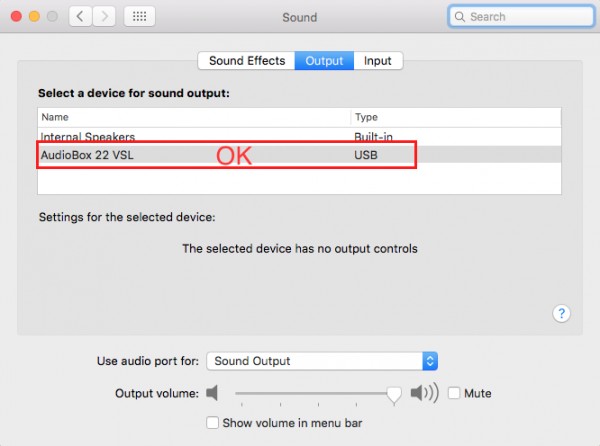
This is where you should see your AudioBox Series device appear for Output and Input.
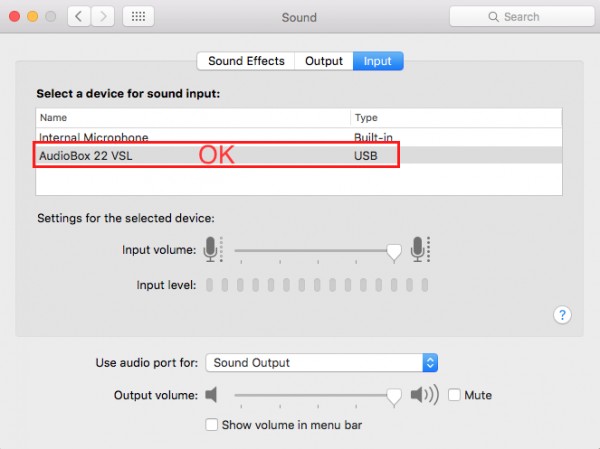
Your AudioBox is now setup.
The AudioBox VSL software will not be functional on OS X past 10.10.
Continue to use your AudioBox VSL interface as a class compliant device.
You can find more tutorials on how to route your audio in your OS and in your applications in our knowledge base at http://support.presonus.com/forums/20568836-AudioBox-VSL-Series
Source: http://support.presonus.com/entries/20353062-How-do-I-completely-remove-AudioBox-VSL-on-my-Mac-